NiceGUI 是一个基于 Python 的图形用户界面(GUI)框架,用于快速创建现代的、响应式的 Web 应用程序。它的目标是简化 GUI 开发,允许开发者通过 Python 脚本来创建漂亮的界面,而无需涉及 HTML、CSS 或 JavaScript。NiceGUI 使用了 FastAPI(一个高性能的 Python Web 框架)和 Vue.js(一个流行的 JavaScript 前端框架)作为后台和前端支持。
主要特点:
Python 编程语言:完全基于 Python,使 Python 开发者能够快速构建 GUI 应用。
响应式设计:自动适配各种屏幕尺寸,提供跨平台支持,适用于桌面和移动设备。
无需前端知识:开发者不需要深入了解 HTML、CSS 或 JavaScript。
现代界面组件:支持多种现代 UI 元素,如按钮、表格、图表、输入框等。
与 FastAPI 集成:后台可以非常容易地与 FastAPI 构建的 API 服务进行集成,支持实时更新和数据交互。
易于部署:创建的应用可以很容易地部署为 Web 应用,可以通过浏览器访问。
使用场景:
快速构建数据展示和管理系统。
可视化数据分析工具。
需要一个简洁、快速开发界面的 Web 应用程序。
import
https://github.com/syejing/nicegui-reference-cn?tab=readme-ov-file
一、基础元素
1、标签
显示一些文本。
from nicegui import ui

ui.label('some label')

ui.run()

2、图标
此元素基于 Quasar 的 QIcon 组件。
Material Symbols and Icons - Google Fonts,可能的名称参考
from nicegui import ui

ui.icon('thumb_up', color='primary').classes('text-5xl')

ui.run()
![]()
3、头像
一个包装了 Quasar 的 QAvatar 组件的头像元素。Avatar | Quasar Framework
from nicegui import ui

ui.avatar('favorite_border', text_color='grey-11', square=True)
ui.avatar('img:https://nicegui.io/logo_square.png', color='blue-2')

ui.run()
![]()
4、链接
创建一个超链接。
要跳转到页面内的特定位置,您可以使用 ui.link_target(“name”) 放置可链接的锚点,并使用 ui.link(target=“#name”) 链接到它。
from nicegui import ui

ui.link('NiceGUI on GitHub', 'https://github.com/zauberzeug/nicegui')

ui.run()

5、按钮
此元素基于 Quasar 的 QBtn 组件。Button | Quasar Framework
颜色参数接受 Quasar 颜色、Tailwind 颜色或 CSS 颜色。如果使用 Quasar 颜色,按钮将根据 Quasar 主题进行样式设置,包括文本的颜色。请注意,有些颜色,如"red",既是 Quasar 颜色又是 CSS 颜色。在这种情况下,将使用 Quasar 颜色。
from nicegui import ui

ui.button('Click me!', on_click=lambda: ui.notify('You clicked me!'))

ui.run()

6、徽章
一个包装了 Quasar 的 QBadge 组件的徽章元素。Badge | Quasar Framework
from nicegui import ui

with ui.button('Click me!', on_click=lambda: badge.set_text(int(badge.text) + 1)):
    badge = ui.badge('0', color='red').props('floating')

ui.run()

7、切换
此元素基于 Quasar 的 QBtnToggle 组件。Button Toggle | Quasar Framework
选项可以指定为值列表,也可以指定为将值映射到标签的字典。在操纵选项后,请调用 update() 来更新 UI 中的选项。
from nicegui import ui

toggle1 = ui.toggle([1, 2, 3], value=1)
toggle2 = ui.toggle({1: 'A', 2: 'B', 3: 'C'}).bind_value(toggle1, 'value')

ui.run()

8、单选选择
此元素基于 Quasar 的 QRadio 组件。Radio | Quasar Framework
选项可以指定为值列表,也可以指定为将值映射到标签的字典。在操纵选项后,请调用 update() 来更新 UI 中的选项。
from nicegui import ui

radio1 = ui.radio([1, 2, 3], value=1).props('inline')
radio2 = ui.radio({1: 'A', 2: 'B', 3: 'C'}).props('inline').bind_value(radio1, 'value')

ui.run()

9、下拉选择
此元素基于 Quasar 的 QSelect 组件。Select | Quasar Framework
选项可以指定为值列表,也可以指定为将值映射到标签的字典。在操纵选项后,请调用 update() 来更新 UI 中的选项。
from nicegui import ui

select1 = ui.select([1, 2, 3], value=1)
select2 = ui.select({1: 'One', 2: 'Two', 3: 'Three'}).bind_value(select1, 'value')

ui.run()

10、复选框
此元素基于 Quasar 的 QCheckbox 组件。Checkbox | Quasar Framework
from nicegui import ui

checkbox = ui.checkbox('check me')
ui.label('Check!').bind_visibility_from(checkbox, 'value')

ui.run()

11、开关
此元素基于 Quasar 的 QToggle 组件。Toggle | Quasar Framework
from nicegui import ui

switch = ui.switch('switch me')
ui.label('Switch!').bind_visibility_from(switch, 'value')

ui.run()

12、滑块
此元素基于 Quasar 的 QSlider 组件。Slider | Quasar Framework
from nicegui import ui

slider = ui.slider(min=0, max=100, value=50)
ui.label().bind_text_from(slider, 'value')

ui.run()

13、操纵杆
基于 nipple.js 创建一个操纵杆。Nipplejs by yoannmoinet
from nicegui import ui

ui.joystick(color='blue', size=50,
            on_move=lambda e: coordinates.set_text(f"{e.x:.3f}, {e.y:.3f}"),
            on_end=lambda _: coordinates.set_text('0, 0'))
coordinates = ui.label('0, 0')

ui.run()

14、文本输入
此元素基于 Quasar 的 QInput 组件。Input | Quasar Framework
on_change 事件在每次按键时都会被调用,数值会相应地更新。如果您希望等到用户确认输入,您可以注册一个自定义事件回调,例如 ui.input(…).on(‘keydown.enter’, …) 或 ui.input(…).on(‘blur’, …)。
您可以使用 validation 参数来定义一组验证规则的字典。第一个失败的规则的键将显示为错误消息。
from nicegui import ui

ui.input(label='Text', placeholder='start typing',
         on_change=lambda e: result.set_text('you typed: ' + e.value),
         validation={'Input too long': lambda value: len(value) < 20})
result = ui.label()

ui.run()

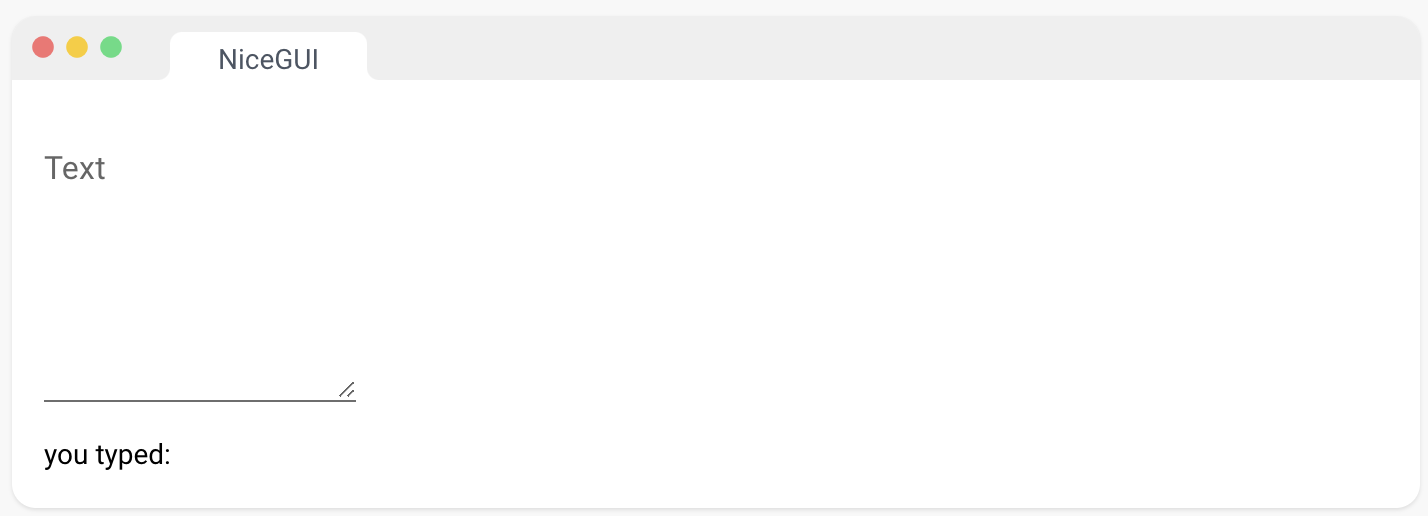
15、文本框
此元素基于 Quasar 的 QInput 组件Input | Quasar Framework 。类型设置为 textarea 以创建多行文本输入。
您可以使用 validation 参数来定义一组验证规则的字典。第一个失败的规则的键将显示为错误消息。"
from nicegui import ui

ui.textarea(label='Text', placeholder='start typing',
            on_change=lambda e: result.set_text('you typed: ' + e.value))
result = ui.label()

ui.run()
16、数字输入
此元素基于 Quasar 的 QInput 组件。Input | Quasar Framework
您可以使用 validation 参数来定义一组验证规则的字典。第一个失败的规则的键将显示为错误消息。
from nicegui import ui

ui.number(label='Number', value=3.1415927, format='%.2f',
          on_change=lambda e: result.set_text(f'you entered: {e.value}'))
result = ui.label()

ui.run()

17、旋钮
此元素基于 Quasar 的 QKnob 组件Knob | Quasar Framework。该元素用于通过鼠标/触摸滑动从用户获取数字输入。
from nicegui import ui

knob = ui.knob(0.3, show_value=True)

with ui.knob(color='orange', track_color='grey-2').bind_value(knob, 'value'):
    ui.icon('volume_up')

ui.run()

18、颜色输入
此元素扩展了Quasar的QInput组件,具有颜色选择器功能。Input | Quasar Framework
from nicegui import ui

label = ui.label('Change my color!')
ui.color_input(label='Color', value='#000000',
               on_change=lambda e: label.style(f'color:{e.value}'))

ui.run()

19、颜色选择器
此元素基于 Quasar 的 QMenu | Quasar Framework和 QColor 组件。
from nicegui import ui

with ui.button(icon='colorize') as button:
    ui.color_picker(on_pick=lambda e: button.style(f'background-color:{e.color}!important'))

ui.run()

20、日期输入
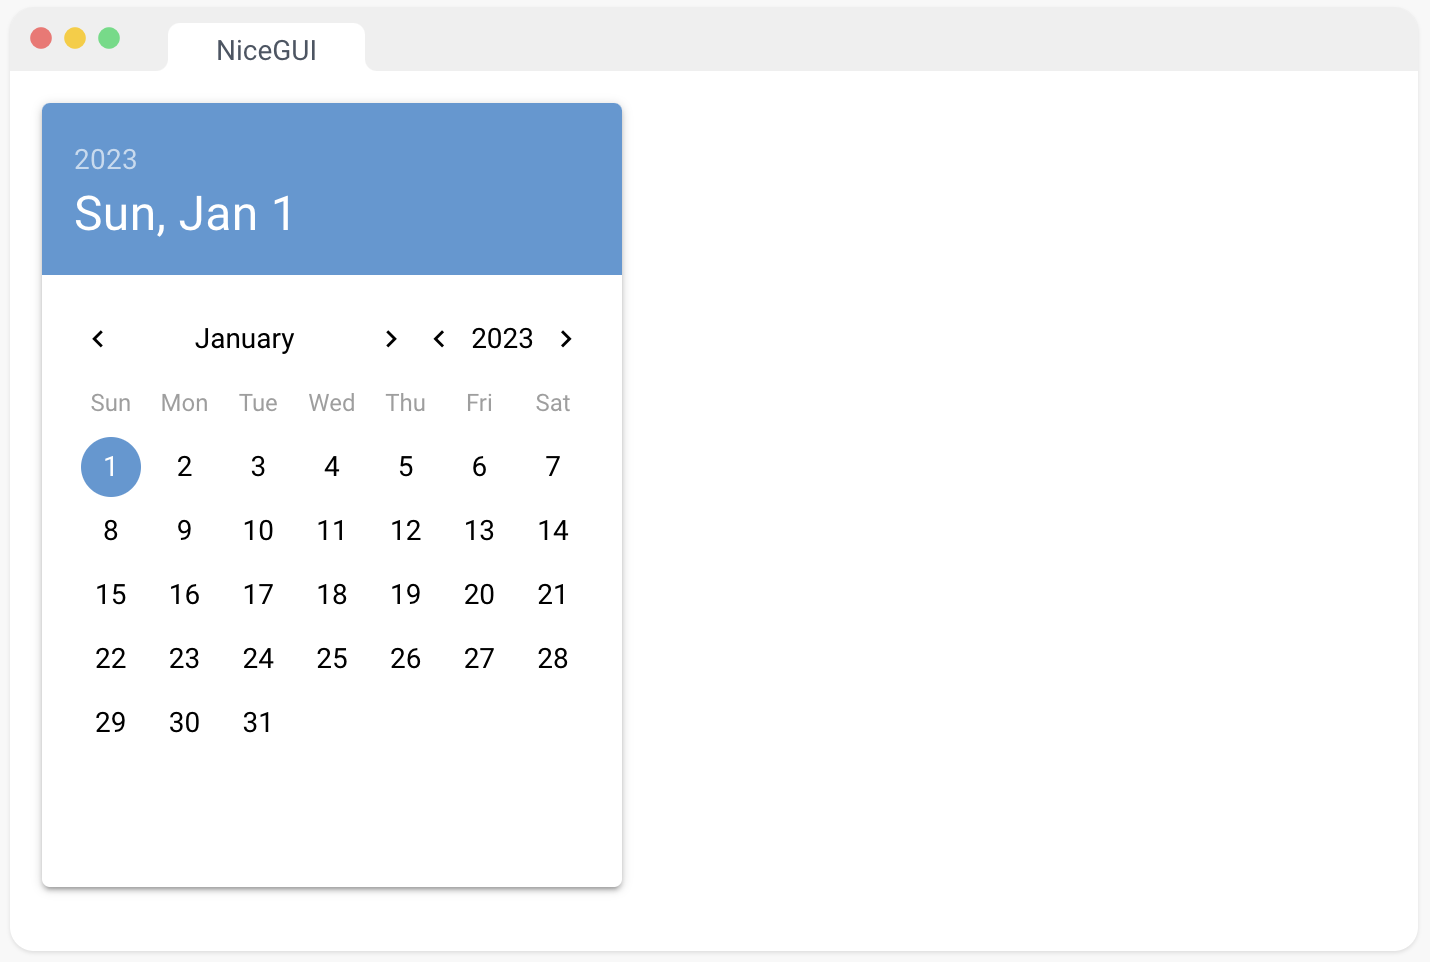
此元素基于 Quasar 的 QDate | Quasar Framework 组件。日期是一个字符串,格式由 mask 参数定义。
您还可以使用 range 或 multiple 属性来选择一段日期或多个日期:
ui.date({‘from’: ‘2023-01-01’, ‘to’: ‘2023-01-05’}).props(‘range’)
ui.date([‘2023-01-01’, ‘2023-01-02’, ‘2023-01-03’]).props(‘multiple’)
ui.date([{‘from’: ‘2023-01-01’, ‘to’: ‘2023-01-05’}, ‘2023-01-07’]).props(‘multiple range’)
from nicegui import ui

ui.date(value='2023-01-01', on_change=lambda e: result.set_text(e.value))
result = ui.label()

ui.run()
21、时间输入
此元素基于 Quasar 的 QTime 组件QDate | Quasar Framework。时间是一个字符串,格式由 mask 参数定义。
from nicegui import ui

ui.time(value='12:00', on_change=lambda e: result.set_text(e.value))
result = ui.label()

ui.run()

22、文件上传
基于 Quasar 的 QUploader 组件。Uploader | Quasar Framework
from nicegui import ui

ui.upload(on_upload=lambda e: ui.notify(f'Uploaded {e.name}')).classes('max-w-full')

ui.run()

23、聊天消息
基于 Quasar 的 Chat Message 组件。Chat Message | Quasar Framework
from nicegui import ui

ui.chat_message('Hello NiceGUI!',
                name='Robot',
                stamp='now',
                avatar='https://robohash.org/ui')

ui.run()

24、通用元素
这个类是所有其他UI元素的基类。但您可以使用它来创建带有任意HTML标签的元素。
from nicegui import ui

with ui.element('div').classes('p-2 bg-blue-100'):
    ui.label('inside a colored div')

ui.run()

二、标记语言
1、Markdown 元素
将 Markdown 渲染到页面上。
Markdown 是一种轻量级标记语言,用于排版和格式化文本,常用于撰写文档、博客文章等。
from nicegui import ui

ui.markdown('''This is **Markdown**.''')

ui.run()

2、Mermaid 图表
用 Markdown 类似的 Mermaid | Diagramming and charting tool 语言编写的图表和图表的渲染。Mermaid 语法也可以在 Markdown 元素内使用,通过将扩展字符串 ‘mermaid’ 提供给 ui.markdown 元素。
from nicegui import ui

ui.mermaid('''
graph LR;
    A --> B;
    A --> C;
''')

ui.run()

3、HTML 元素
将任意的 HTML 渲染到页面上。可以使用 Tailwind Tailwind CSS - Rapidly build modern websites without ever leaving your HTML. 进行样式设置。您还可以使用 ui.add_head_html 将 HTML 代码添加到文档的头部,使用 ui.add_body_html 将其添加到文档的正文部分。
HTML 是一种用于创建网页和网页应用程序的标记语言,它定义了网页的结构和内容,包括文本、图像、超链接等。
from nicegui import ui

ui.html('This is <strong>HTML</strong>.')

ui.run()

4、SVG
您可以使用 ui.html 元素添加可伸缩矢量图形(Scalable Vector Graphics,SVG)
from nicegui import ui

content = '''
    <svg viewBox="0 0 200 200" width="100" height="100" xmlns="http://www.w3.org/2000/svg">
    <circle cx="100" cy="100" r="78" fill="#ffde34" stroke="black" stroke-width="3" />
    <circle cx="80" cy="85" r="8" />
    <circle cx="120" cy="85" r="8" />
    <path d="m60,120 C75,150 125,150 140,120" style="fill:none; stroke:black; stroke-width:8; stroke-linecap:round" />
    </svg>'''
ui.html(content)

ui.run()

三、图片,音频和视频
1、图像
显示一幅图片。此元素基于 Quasar 的 QImg 组件。QImg | Quasar Framework
from nicegui import ui

ui.image('https://picsum.photos/id/377/640/360')

ui.run()

2、标题和叠加
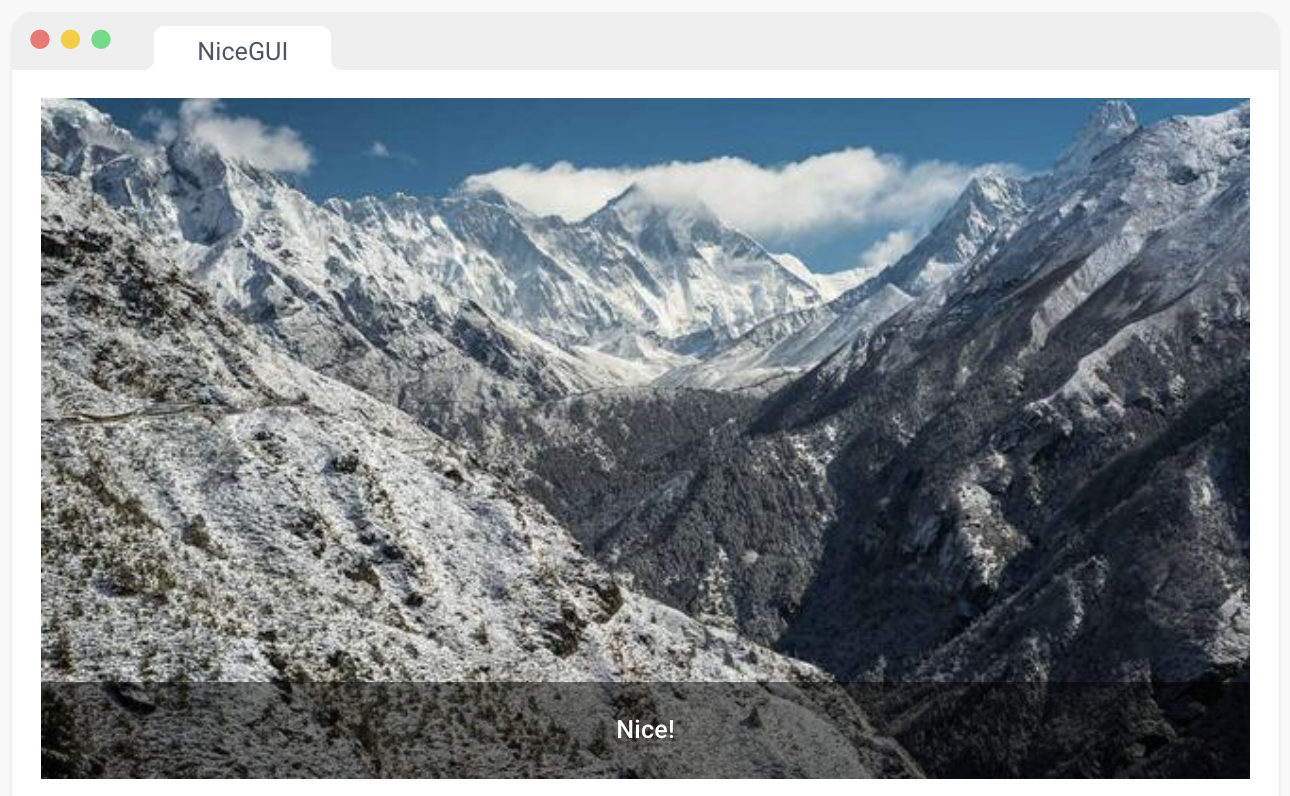
通过在 ui.image 元素内嵌套元素,您可以创建增强效果。
使用 Quasar classes QImg | Quasar Framework 进行标题的定位和样式设置。要叠加一个 SVG 图形,使 viewBox 与图像的大小完全匹配,并提供100%的宽度/高度以与实际渲染大小相匹配。
from nicegui import ui

with ui.image('https://picsum.photos/id/29/640/360'):
    ui.label('Nice!').classes('absolute-bottom text-subtitle2 text-center')

with ui.image('https://cdn.stocksnap.io/img-thumbs/960w/airplane-sky_DYPWDEEILG.jpg'):
    ui.html('''
        <svg viewBox="0 0 960 638" width="100%" height="100%" xmlns="http://www.w3.org/2000/svg">
        <circle cx="445" cy="300" r="100" fill="none" stroke="red" stroke-width="20" />
        </svg>
    ''').classes('bg-transparent')

ui.run()

3、交互式图像
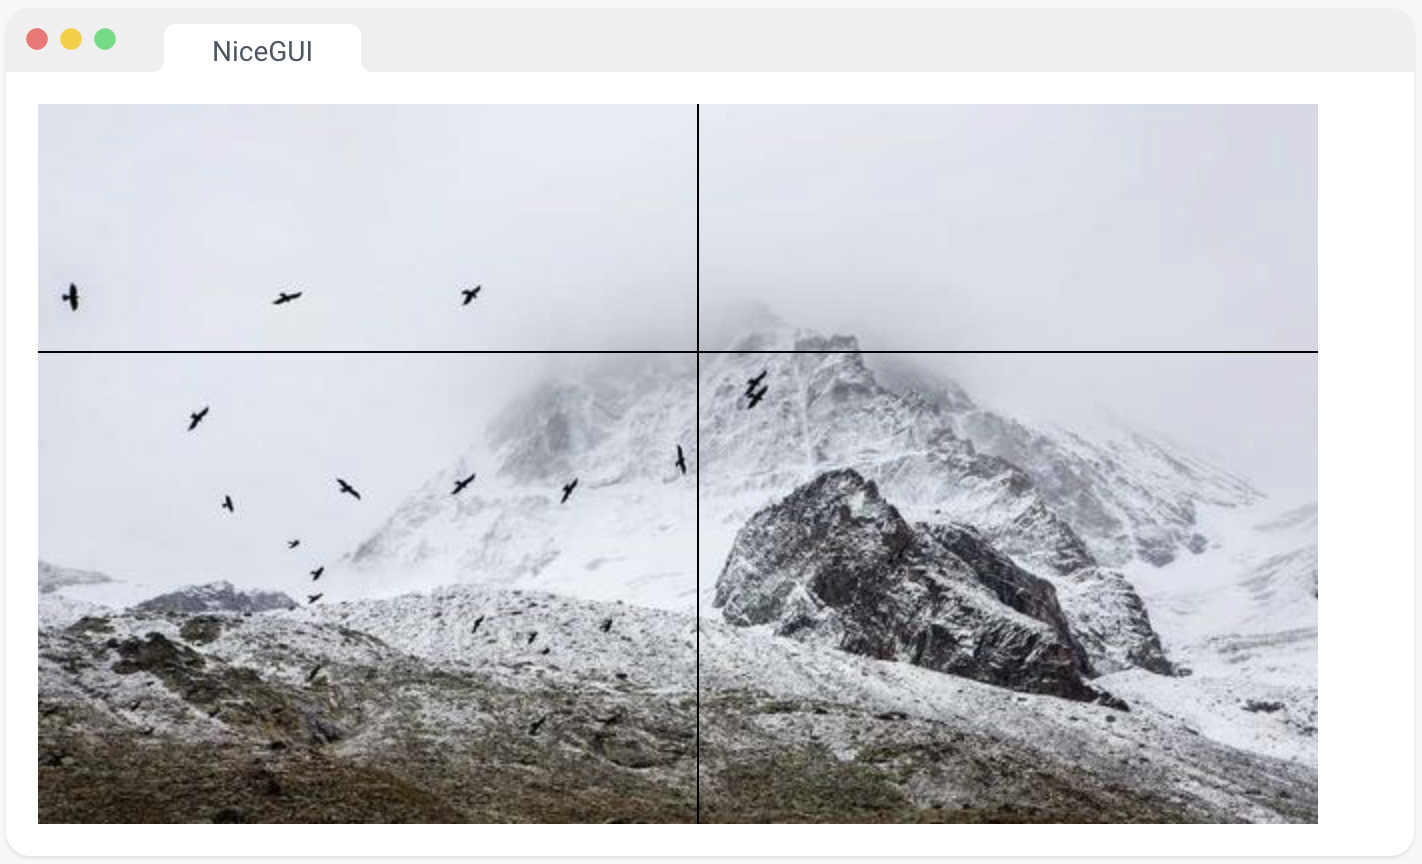
创建带有处理鼠标事件并提供图像坐标的SVG叠加层的图像。这也是处理图像更新不会闪烁的最佳选择。如果源 URL 的更改速度快于浏览器加载图像的速度,某些图像将被跳过。因此,反复更新图像源将自动适应可用的带宽。请参考OpenCV Webcam获取示例。nicegui/examples/opencv_webcam/main.py at main · zauberzeug/nicegui (github.com)
from nicegui import ui
from nicegui.events import MouseEventArguments

def mouse_handler(e: MouseEventArguments):
    color = 'SkyBlue' if e.type == 'mousedown' else 'SteelBlue'
    ii.content += f'<circle cx="{e.image_x}" cy="{e.image_y}" r="15" fill="none" stroke="{color}" stroke-width="4" />'
    ui.notify(f'{e.type} at ({e.image_x:.1f}, {e.image_y:.1f})')

src = 'https://picsum.photos/id/565/640/360'
ii = ui.interactive_image(src, on_mouse=mouse_handler, events=['mousedown', 'mouseup'], cross=True)

ui.run()
4、音频
显示一个音频播放器。
请查看此处,以获取可以使用通用事件订阅 on() 进行订阅的事件列表。
https://developer.mozilla.org/en-US/docs/Web/HTML/Element/audio#events
from nicegui import ui

a = ui.audio('https://cdn.pixabay.com/download/audio/2022/02/22/audio_d1718ab41b.mp3')
a.on('ended', lambda _: ui.notify('Audio playback completed'))

ui.button(on_click=lambda: a.props('muted'), icon='volume_off').props('outline')
ui.button(on_click=lambda: a.props(remove='muted'), icon='volume_up').props('outline')

ui.run()

5、视频
显示一个视频。
请查看此处,以获取可以使用通用事件订阅 on() 进行订阅的事件列表。
https://developer.mozilla.org/en-US/docs/Web/HTML/Element/video#events
from nicegui import ui

v = ui.video('https://test-videos.co.uk/vids/bigbuckbunny/mp4/h264/360/Big_Buck_Bunny_360_10s_1MB.mp4')
v.on('ended', lambda _: ui.notify('Video playback completed'))

ui.run()

四、数据元素
1、表格
一个基于 Quasar 的 QTable 组件的表格。Table | Quasar Framework
如果选择属性设置为 ‘single’ 或 ‘multiple’,那么可以访问一个包含所选行的 selected 属性。
from nicegui import ui

columns = [
    {'name': 'name', 'label': 'Name', 'field': 'name', 'required': True, 'align': 'left'},
    {'name': 'age', 'label': 'Age', 'field': 'age', 'sortable': True},
]
rows = [
    {'name': 'Alice', 'age': 18},
    {'name': 'Bob', 'age': 21},
    {'name': 'Carol'},
]
ui.table(columns=columns, rows=rows, row_key='name')

ui.run()

2、AG Grid (大数据)
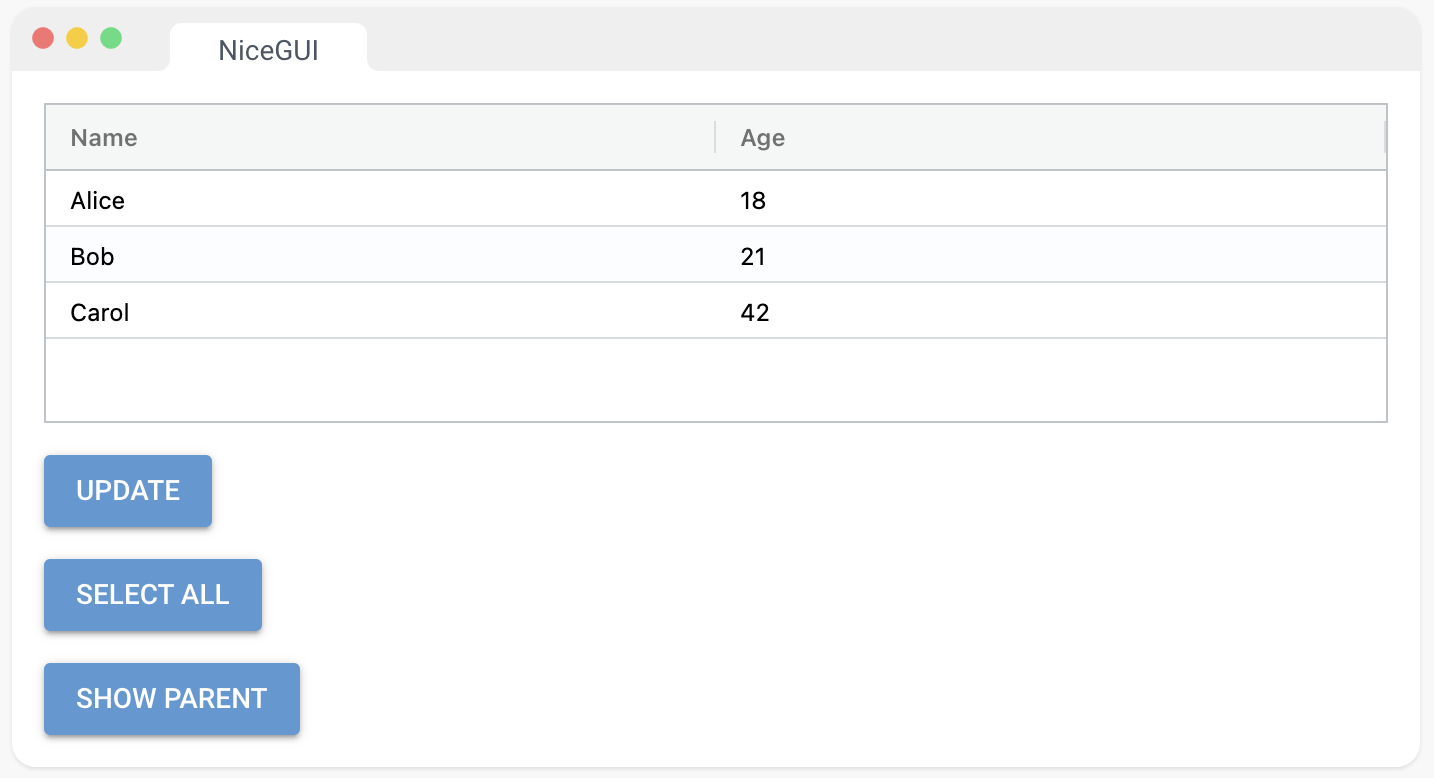
使用 AG Grid 创建网格的元素。
可以使用 call_api_method 方法来调用 AG Grid API 方法。
from nicegui import ui

grid = ui.aggrid({
    'defaultColDef': {'flex': 1},
    'columnDefs': [
        {'headerName': 'Name', 'field': 'name'},
        {'headerName': 'Age', 'field': 'age'},
        {'headerName': 'Parent', 'field': 'parent', 'hide': True},
    ],
    'rowData': [
        {'name': 'Alice', 'age': 18, 'parent': 'David'},
        {'name': 'Bob', 'age': 21, 'parent': 'Eve'},
        {'name': 'Carol', 'age': 42, 'parent': 'Frank'},
    ],
    'rowSelection': 'multiple',
}).classes('max-h-40')

def update():
    grid.options['rowData'][0]['age'] += 1
    grid.update()

ui.button('Update', on_click=update)
ui.button('Select all', on_click=lambda: grid.call_api_method('selectAll'))
ui.button('Show parent', on_click=lambda: grid.call_column_api_method('setColumnVisible', 'parent', True))

ui.run()
3、图表
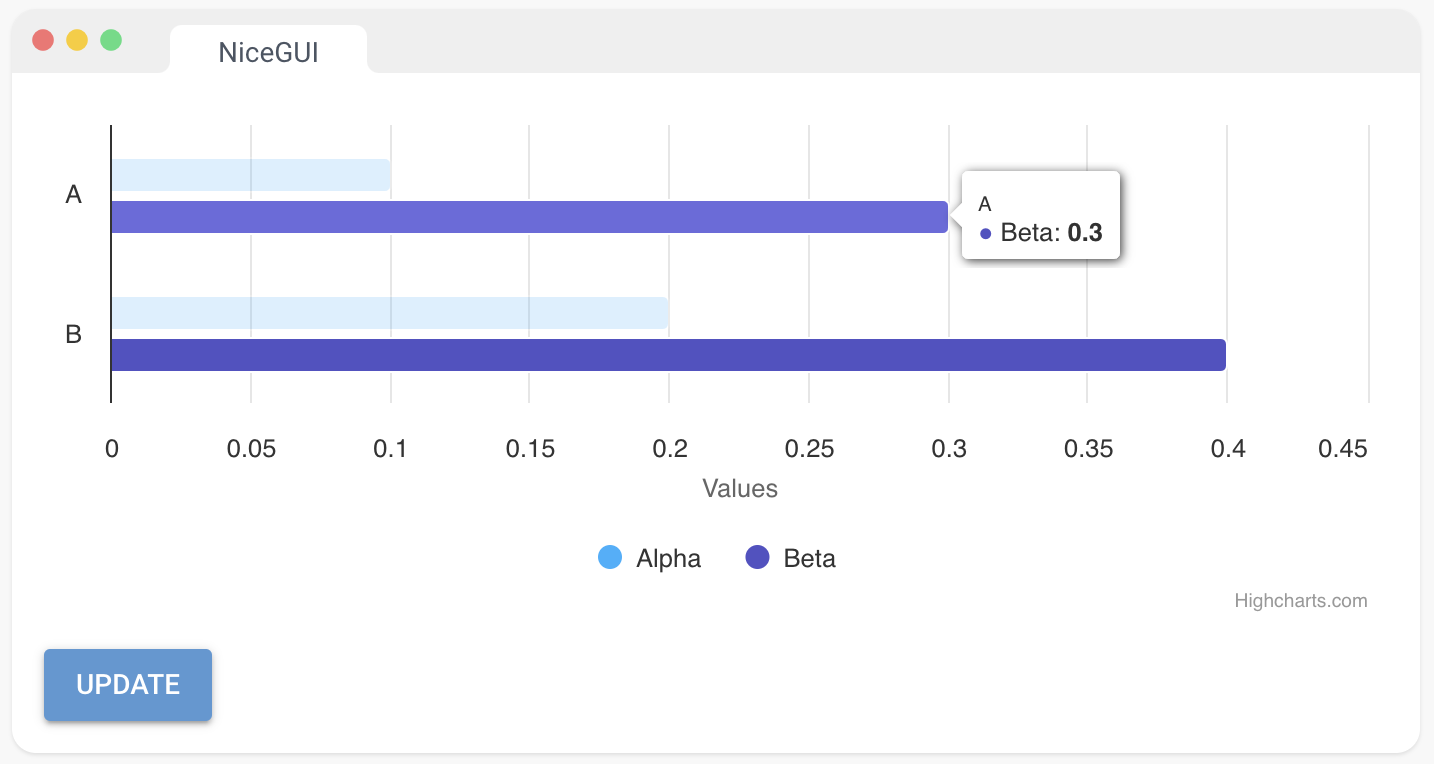
使用 Highcharts Interactive charting library | Highcharts 创建图表的元素。可以通过更改选项属性将更新推送到图表。在数据发生变化后,请调用 update 方法来刷新图表。
默认情况下,会创建一个 Highcharts.chart。如果要使用 Highcharts.stockChart 等其他选项,请将 type 属性设置为 “stockChart”。
from nicegui import ui
from random import random

chart = ui.chart({
    'title': False,
    'chart': {'type': 'bar'},
    'xAxis': {'categories': ['A', 'B']},
    'series': [
        {'name': 'Alpha', 'data': [0.1, 0.2]},
        {'name': 'Beta', 'data': [0.3, 0.4]},
    ],
}).classes('w-full h-64')

def update():
    chart.options['series'][0]['data'][0] = random()
    chart.update()

ui.button('Update', on_click=update)

ui.run()
4、Apache EChart
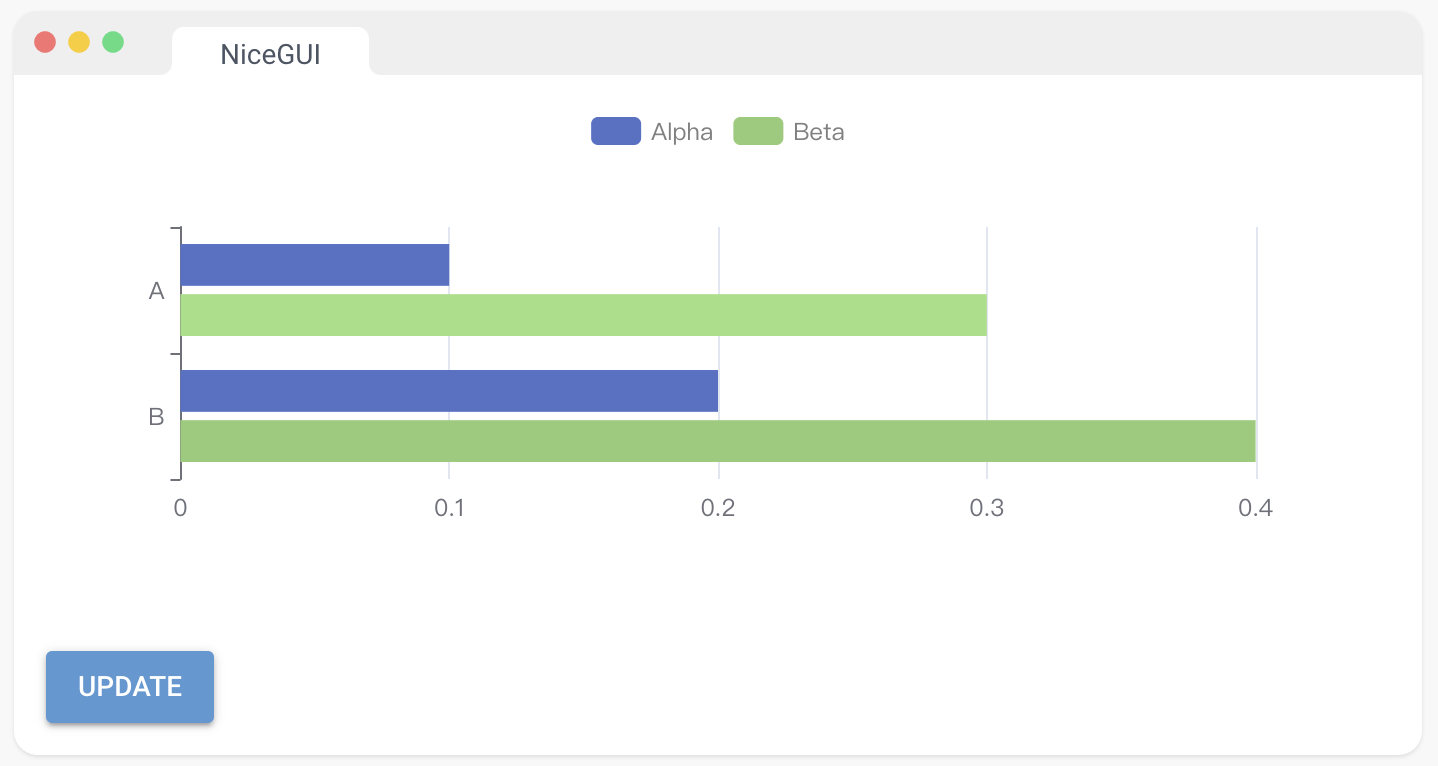
使用 Apache ECharts 创建图表的元素。可以通过更改选项属性将更新推送到图表。在数据发生变化后,请调用 update 方法来刷新图表。
from nicegui import ui
from random import random

echart = ui.echart({
    'xAxis': {'type': 'value'},
    'yAxis': {'type': 'category', 'data': ['A', 'B'], 'inverse': True},
    'legend': {'textStyle': {'color': 'gray'}},
    'series': [
        {'type': 'bar', 'name': 'Alpha', 'data': [0.1, 0.2]},
        {'type': 'bar', 'name': 'Beta', 'data': [0.3, 0.4]},
    ],
})

def update():
    echart.options['series'][0]['data'][0] = random()
    echart.update()

ui.button('Update', on_click=update)

ui.run()
5、Pyplot 上下文
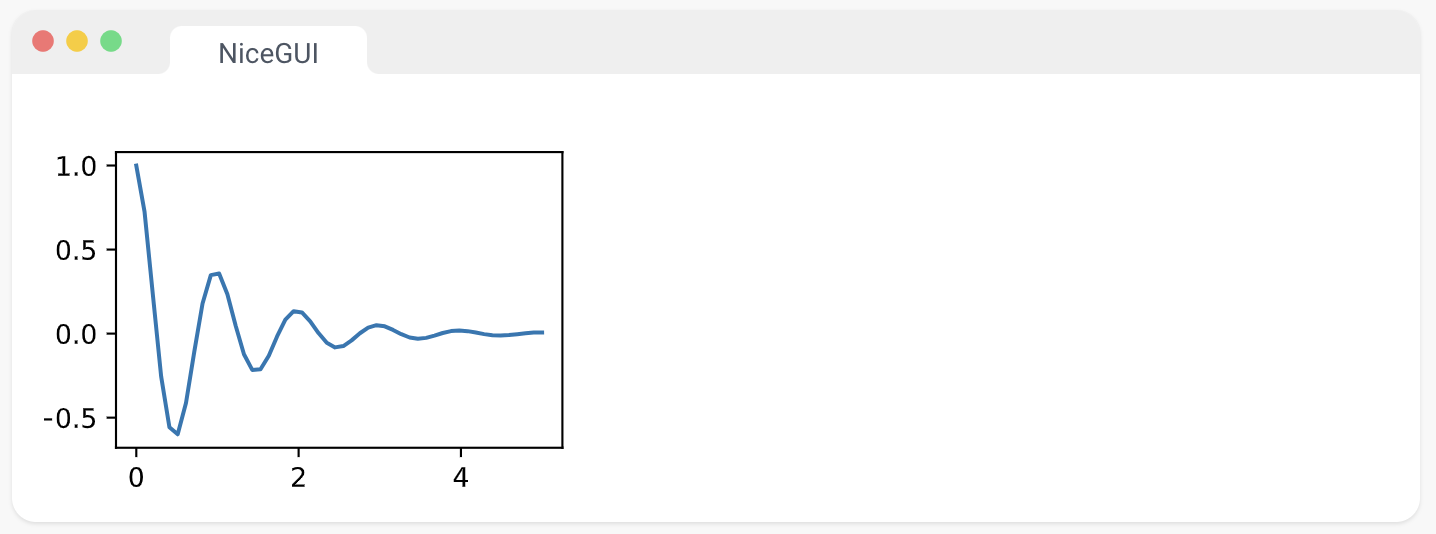
创建一个上下文以配置 Matplotlib 绘图。Matplotlib — Visualization with Python
import numpy as np
from matplotlib import pyplot as plt
from nicegui import ui

with ui.pyplot(figsize=(3, 2)):
    x = np.linspace(0.0, 5.0)
    y = np.cos(2 * np.pi * x) * np.exp(-x)
    plt.plot(x, y, '-')

ui.run()
6、线性图
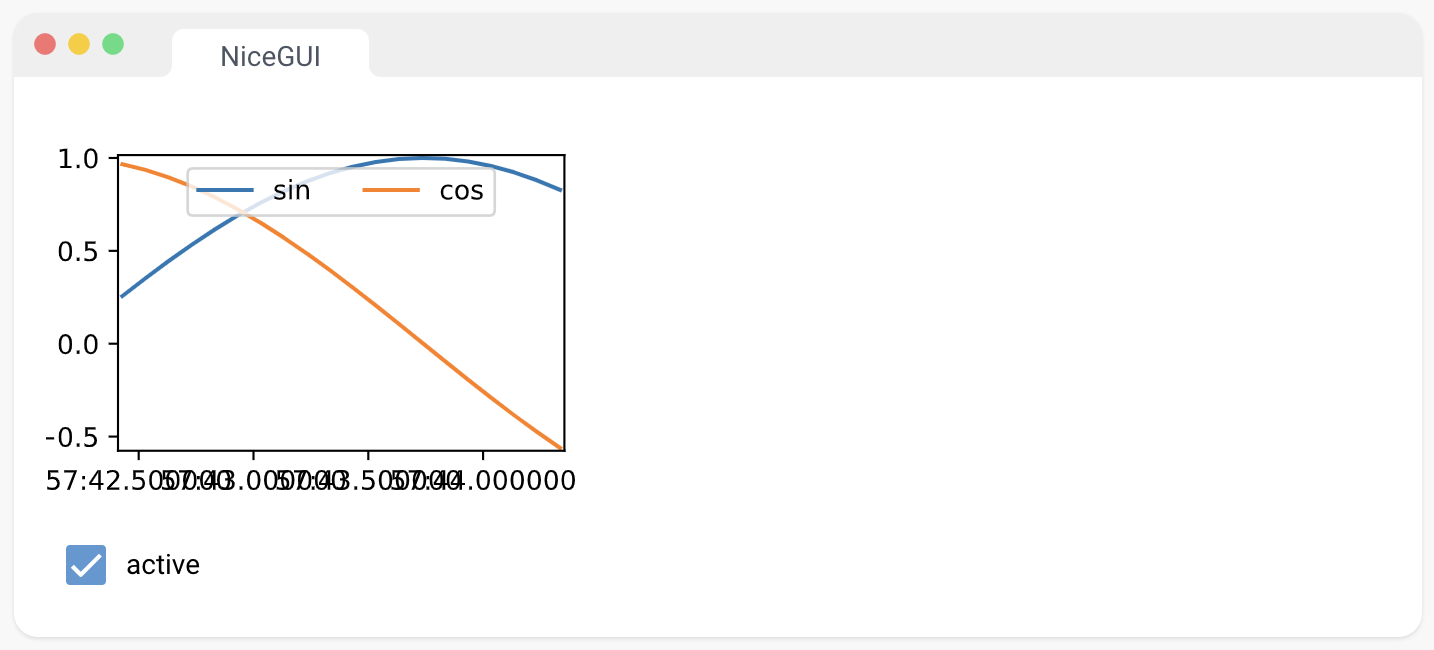
使用 pyplot 创建一张线性图。当与 ui.timer 结合使用时,push 方法可以提供实时更新。
import math
from datetime import datetime
from nicegui import ui

line_plot = ui.line_plot(n=2, limit=20, figsize=(3, 2), update_every=5) \
    .with_legend(['sin', 'cos'], loc='upper center', ncol=2)

def update_line_plot() -> None:
    now = datetime.now()
    x = now.timestamp()
    y1 = math.sin(x)
    y2 = math.cos(x)
    line_plot.push([now], [[y1], [y2]])

line_updates = ui.timer(0.1, update_line_plot, active=False)
line_checkbox = ui.checkbox('active').bind_value(line_updates, 'active')

ui.run()
7、Plotly 元素
渲染 Plotly 图表。有两种传递 Plotly 图表的方式,详见 figure 参数:
- 传递 go.Figure 对象,详见 https://plotly.com/python/
- 传递 Python 字典对象,包含 data、layout 和 config 键(可选),详见 https://plotly.com/javascript/
为获得最佳性能,使用声明性字典方法创建 Plotly 图表。
import plotly.graph_objects as go
from nicegui import ui

fig = go.Figure(go.Scatter(x=[1, 2, 3, 4], y=[1, 2, 3, 2.5]))
fig.update_layout(margin=dict(l=0, r=0, t=0, b=0))
ui.plotly(fig).classes('w-full h-40')

ui.run()

8、线性进度条
一个包装了 Quasar 的 QLinearProgress 组件的线性进度条。Linear Progress | Quasar Framework
from nicegui import ui

slider = ui.slider(min=0, max=1, step=0.01, value=0.5)
ui.linear_progress().bind_value_from(slider, 'value')

ui.run()

9、圆形进度条
一个包装了 Quasar 的 QCircularProgress 组件的圆形进度条。Circular Progress | Quasar Framework
from nicegui import ui

slider = ui.slider(min=0, max=1, step=0.01, value=0.5)
ui.circular_progress().bind_value_from(slider, 'value')

ui.run()

10、旋转器
此元素基于 Quasar 的 QSpinner 组件。Spinners | Quasar Framework
from nicegui import ui

with ui.row():
    ui.spinner(size='lg')
    ui.spinner('audio', size='lg', color='green')
    ui.spinner('dots', size='lg', color='red')

ui.run()

11、3D 场景
使用 Three.js – JavaScript 3D Library (threejs.org) 显示一个3D场景。目前,NiceGUI支持盒子、球体、圆柱/圆锥、挤压体、直线、曲线和纹理网格。对象可以进行平移、旋转,并以不同的颜色、透明度或线框形式显示。它们还可以分组以应用联合运动。
from nicegui import ui

with ui.scene().classes('w-full h-64') as scene:
    scene.sphere().material('#4488ff')
    scene.cylinder(1, 0.5, 2, 20).material('#ff8800', opacity=0.5).move(-2, 1)
    scene.extrusion([[0, 0], [0, 1], [1, 0.5]], 0.1).material('#ff8888').move(-2, -2)

    with scene.group().move(z=2):
        scene.box().move(x=2)
        scene.box().move(y=2).rotate(0.25, 0.5, 0.75)
        scene.box(wireframe=True).material('#888888').move(x=2, y=2)

    scene.line([-4, 0, 0], [-4, 2, 0]).material('#ff0000')
    scene.curve([-4, 0, 0], [-4, -1, 0], [-3, -1, 0], [-3, -2, 0]).material('#008800')

    logo = 'https://avatars.githubusercontent.com/u/2843826'
    scene.texture(logo, [[[0.5, 2, 0], [2.5, 2, 0]],
                         [[0.5, 0, 0], [2.5, 0, 0]]]).move(1, -2)

    teapot = 'https://upload.wikimedia.org/wikipedia/commons/9/93/Utah_teapot_(solid).stl'
    scene.stl(teapot).scale(0.2).move(-3, 4)

    scene.text('2D', 'background: rgba(0, 0, 0, 0.2); border-radius: 5px; padding: 5px').move(z=2)
    scene.text3d('3D', 'background: rgba(0, 0, 0, 0.2); border-radius: 5px; padding: 5px').move(y=-2).scale(.05)

ui.run()

12、树状结构
使用 Quasar 的 QTree 组件显示分层数据。Tree | Quasar Framework
如果使用ID,请确保它们在整个树中是唯一的。
要使用复选框和 on_tick,将 tick_strategy 参数设置为 “leaf”、“leaf-filtered” 或 “strict”。
from nicegui import ui

ui.tree([
    {'id': 'numbers', 'children': [{'id': '1'}, {'id': '2'}]},
    {'id': 'letters', 'children': [{'id': 'A'}, {'id': 'B'}]},
], label_key='id', on_select=lambda e: ui.notify(e.value))

ui.run()

13、日志视图
创建一个日志视图,允许添加新行而无需重新传输整个历史记录给客户端。
from datetime import datetime
from nicegui import ui

log = ui.log(max_lines=10).classes('w-full h-20')
ui.button('Log time', on_click=lambda: log.push(datetime.now().strftime('%X.%f')[:-5]))

ui.run()

14、编辑器
一个基于 Quasar 的 QEditor Editor (WYSIWYG) | Quasar Framework 的所见即所得(WYSIWYG)编辑器。value 是一个包含格式化文本的字符串,格式为HTML代码。
from nicegui import ui

editor = ui.editor(placeholder='Type something here')
ui.markdown().bind_content_from(editor, 'value',
                                backward=lambda v: f'HTML code:\n```\n{v}\n```')

ui.run()

15、代码
此元素显示带有语法高亮的代码块。
from nicegui import ui

ui.code('''
    from nicegui import ui

    ui.label('Code inception!')

    ui.run()
''').classes('w-full')

ui.run()

16、JSON编辑器
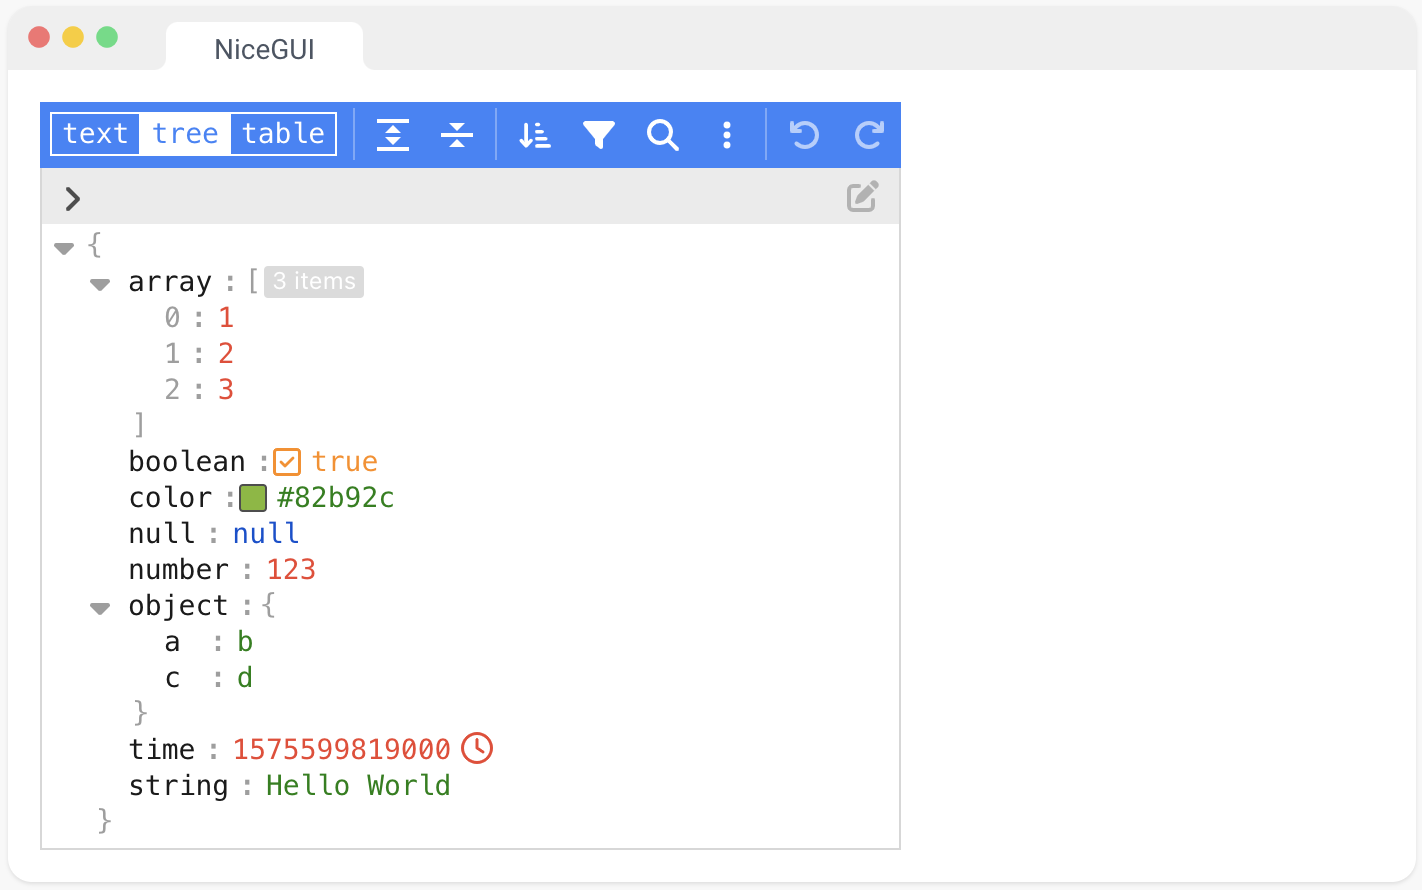
使用 JSONEditor josdejong/svelte-jsoneditor: A web-based tool to view, edit, format, repair, query, transform, and validate JSON (github.com) 创建 JSON 编辑器的元素。可以通过更改 properties 属性将更新推送到编辑器。在数据发生变化后,请调用 update 方法来刷新编辑器。
from nicegui import ui

json = {
    'array': [1, 2, 3],
    'boolean': True,
    'color': '#82b92c',
    None: None,
    'number': 123,
    'object': {
        'a': 'b',
        'c': 'd',
    },
    'time': 1575599819000,
    'string': 'Hello World',
}
ui.json_editor({'content': {'json': json}},
               on_select=lambda e: ui.notify(f'Select: {e}'),
               on_change=lambda e: ui.notify(f'Change: {e}'))

ui.run()
五、布局
1、卡片
此元素基于 Quasar 的 QCard 组件 Card | Quasar Framework。它提供了一个带有投影阴影的容器。
注意:Quasar 组件和此元素之间有细微差异。与此元素不同,原始的 QCard 默认没有填充,并隐藏了嵌套元素的外边框。如果您想要原始的行为,请使用 tight 方法。如果您希望子元素有填充和边框,请将子元素放入另一个容器中。
from nicegui import ui

with ui.card().tight():
    ui.image('https://picsum.photos/id/684/640/360')
    with ui.card_section():
        ui.label('Lorem ipsum dolor sit amet, consectetur adipiscing elit, ...')

ui.run()

2、列元素
提供一个容器,按列排列其子元素。
from nicegui import ui

with ui.column():
    ui.label('label 1')
    ui.label('label 2')
    ui.label('label 3')

ui.run()

3、行元素
提供一个容器,按行排列其子元素。
from nicegui import ui

with ui.row():
    ui.label('label 1')
    ui.label('label 2')
    ui.label('label 3')

ui.run()

4、网格元素
提供一个容器,以网格形式排列其子元素。
from nicegui import ui

with ui.grid(columns=2):
    ui.label('Name:')
    ui.label('Tom')

    ui.label('Age:')
    ui.label('42')

    ui.label('Height:')
    ui.label('1.80m')

ui.run()

5、清除容器内容
要从行、列或卡片容器中删除所有元素,可以调用
container.clear()
或者,您可以通过调用以下方法来移除单个元素:
- container.remove(element: Element),
- container.remove(index: int),或
- element.delete()。
from nicegui import ui

container = ui.row()

def add_face():
    with container:
        ui.icon('face')
add_face()

ui.button('Add', on_click=add_face)
ui.button('Remove', on_click=lambda: container.remove(0) if list(container) else None)
ui.button('Clear', on_click=container.clear)

ui.run()

6、展开元素
提供一个可展开的容器,基于 Quasar 的 QExpansionItem 组件。Expansion Item | Quasar Framework
from nicegui import ui

with ui.expansion('Expand!', icon='work').classes('w-full'):
    ui.label('inside the expansion')

ui.run()

7、滚动区域
通过封装内容以自定义滚动条的方式。该元素公开了Quasar的ScrollArea组件。Scroll Area | Quasar Framework
from nicegui import ui

with ui.row():
    with ui.card().classes('w-32 h-32'):
        with ui.scroll_area():
            ui.label('I scroll. ' * 20)
    with ui.card().classes('w-32 h-32'):
        ui.label('I will not scroll. ' * 10)

ui.run()

8、分隔符
此元素基于 Quasar 的 QSeparator 组件。Separator | Quasar Framework
它用作卡片、菜单和其他组件容器的分隔符,类似于HTML的
标签。
from nicegui import ui

ui.label('text above')
ui.separator()
ui.label('text below')

ui.run()

9、分割器
ui.splitter 元素将屏幕空间分为可调整大小的部分,允许您在应用程序中创建灵活且响应式的布局。
基于 Quasar 的 Splitter 组件: QSplitter | Quasar Framework
它提供了三个可自定义的插槽,before、after 和 separator,可用于在分割器内嵌入其他元素。
from nicegui import ui

with ui.splitter() as splitter:
    with splitter.before:
        ui.label('This is some content on the left hand side.').classes('mr-2')
    with splitter.after:
        ui.label('This is some content on the right hand side.').classes('ml-2')

ui.run()

10、标签页
元素 ui.tabs、ui.tab、ui.tab_panels 和 ui.tab_panel 与 Quasar 的Tabs | Quasar Framework和Tab Panels | Quasar Framework API 类似。
ui.tabs 创建了标签页的容器,例如,可以放置在 ui.header 中。ui.tab_panels 创建了用于标签面板的容器,其中包含实际内容。每个 ui.tab_panel 与一个 ui.tab 元素相关联。
from nicegui import ui

with ui.tabs().classes('w-full') as tabs:
    one = ui.tab('One')
    two = ui.tab('Two')
with ui.tab_panels(tabs, value=two).classes('w-full'):
    with ui.tab_panel(one):
        ui.label('First tab')
    with ui.tab_panel(two):
        ui.label('Second tab')

ui.run()

11、步进器
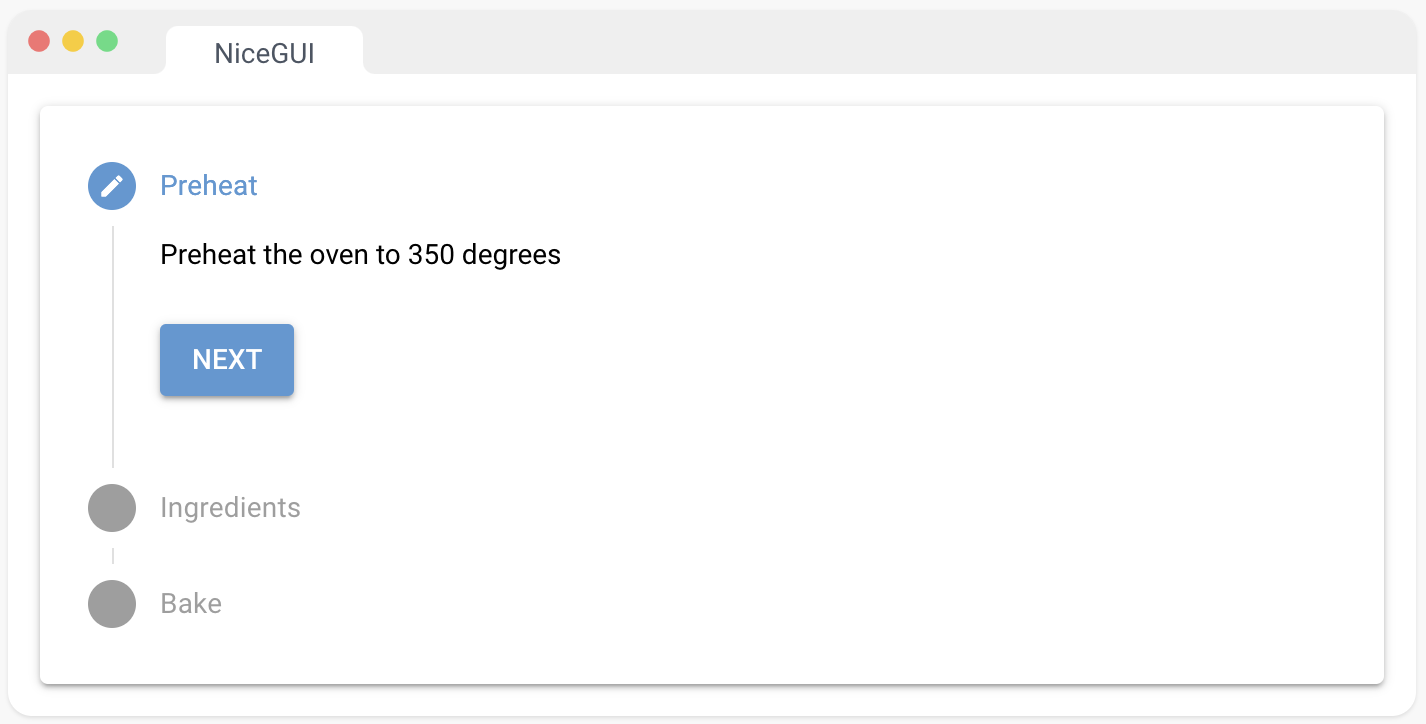
此元素表示 Quasar 的 QStepper 组件 Stepper | Quasar Framework。它包含单独的步骤。
为了避免在切换步骤时出现动态元素的问题,此元素使用了Vue的keep-alive组件。如果客户端性能成为问题,可以禁用此功能。
from nicegui import ui

with ui.stepper().props('vertical').classes('w-full') as stepper:
    with ui.step('Preheat'):
        ui.label('Preheat the oven to 350 degrees')
        with ui.stepper_navigation():
            ui.button('Next', on_click=stepper.next)
    with ui.step('Ingredients'):
        ui.label('Mix the ingredients')
        with ui.stepper_navigation():
            ui.button('Next', on_click=stepper.next)
            ui.button('Back', on_click=stepper.previous).props('flat')
    with ui.step('Bake'):
        ui.label('Bake for 20 minutes')
        with ui.stepper_navigation():
            ui.button('Done', on_click=lambda: ui.notify('Yay!', type='positive'))
            ui.button('Back', on_click=stepper.previous).props('flat')

ui.run()
12、时间线
此元素代表了 Quasar 的 QTimeline 组件。Timeline | Quasar Framework
from nicegui import ui

with ui.timeline(side='right'):
    ui.timeline_entry('Rodja and Falko start working on NiceGUI.',
                      title='Initial commit',
                      subtitle='May 07, 2021')
    ui.timeline_entry('The first PyPI package is released.',
                      title='Release of 0.1',
                      subtitle='May 14, 2021')
    ui.timeline_entry('Large parts are rewritten to remove JustPy '
                      'and to upgrade to Vue 3 and Quasar 2.',
                      title='Release of 1.0',
                      subtitle='December 15, 2022',
                      icon='rocket')

ui.run()

13、走马灯
此元素代表了 Quasar 的 QCarousel 组件 Carousel | Quasar Framework。它包含个别的走马灯幻灯片。
from nicegui import ui

with ui.carousel(animated=True, arrows=True, navigation=True).props('height=180px'):
    with ui.carousel_slide().classes('p-0'):
        ui.image('https://picsum.photos/id/30/270/180').classes('w-[270px]')
    with ui.carousel_slide().classes('p-0'):
        ui.image('https://picsum.photos/id/31/270/180').classes('w-[270px]')
    with ui.carousel_slide().classes('p-0'):
        ui.image('https://picsum.photos/id/32/270/180').classes('w-[270px]')

ui.run()
14、菜单
基于 Quasar 的 QMenu 组件 QMenu | Quasar Framework 创建菜单。菜单应放置在应该显示的元素内部。
from nicegui import ui

with ui.row().classes('w-full items-center'):
    result = ui.label().classes('mr-auto')
    with ui.button(icon='menu'):
        with ui.menu() as menu:
            ui.menu_item('Menu item 1', lambda: result.set_text('Selected item 1'))
            ui.menu_item('Menu item 2', lambda: result.set_text('Selected item 2'))
            ui.menu_item('Menu item 3 (keep open)',
                         lambda: result.set_text('Selected item 3'), auto_close=False)
            ui.separator()
            ui.menu_item('Close', on_click=menu.close)

ui.run()

15、工具提示
只需在 UI 元素上调用 tooltip(text:str) 方法即可提供工具提示。
如果需要更多的样式控制,可以嵌套工具提示元素并应用 props、类和样式。
from nicegui import ui

ui.label('Tooltips...').tooltip('...are shown on mouse over')
with ui.button(icon='thumb_up'):
    ui.tooltip('I like this').classes('bg-green')

ui.run()

16、通知
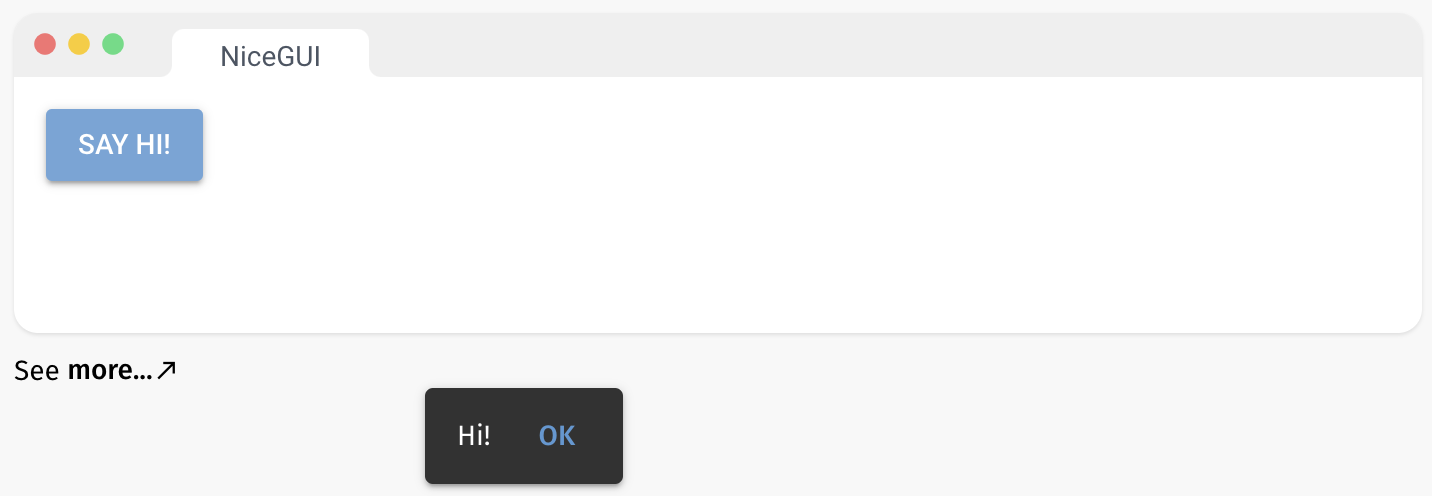
在屏幕上显示通知。
注意:您可以根据 Quasar 的 Notify | Quasar Framework API 传递附加的关键字参数。
from nicegui import ui

ui.button('Say hi!', on_click=lambda: ui.notify('Hi!', close_button='OK'))

ui.run()
17、对话框
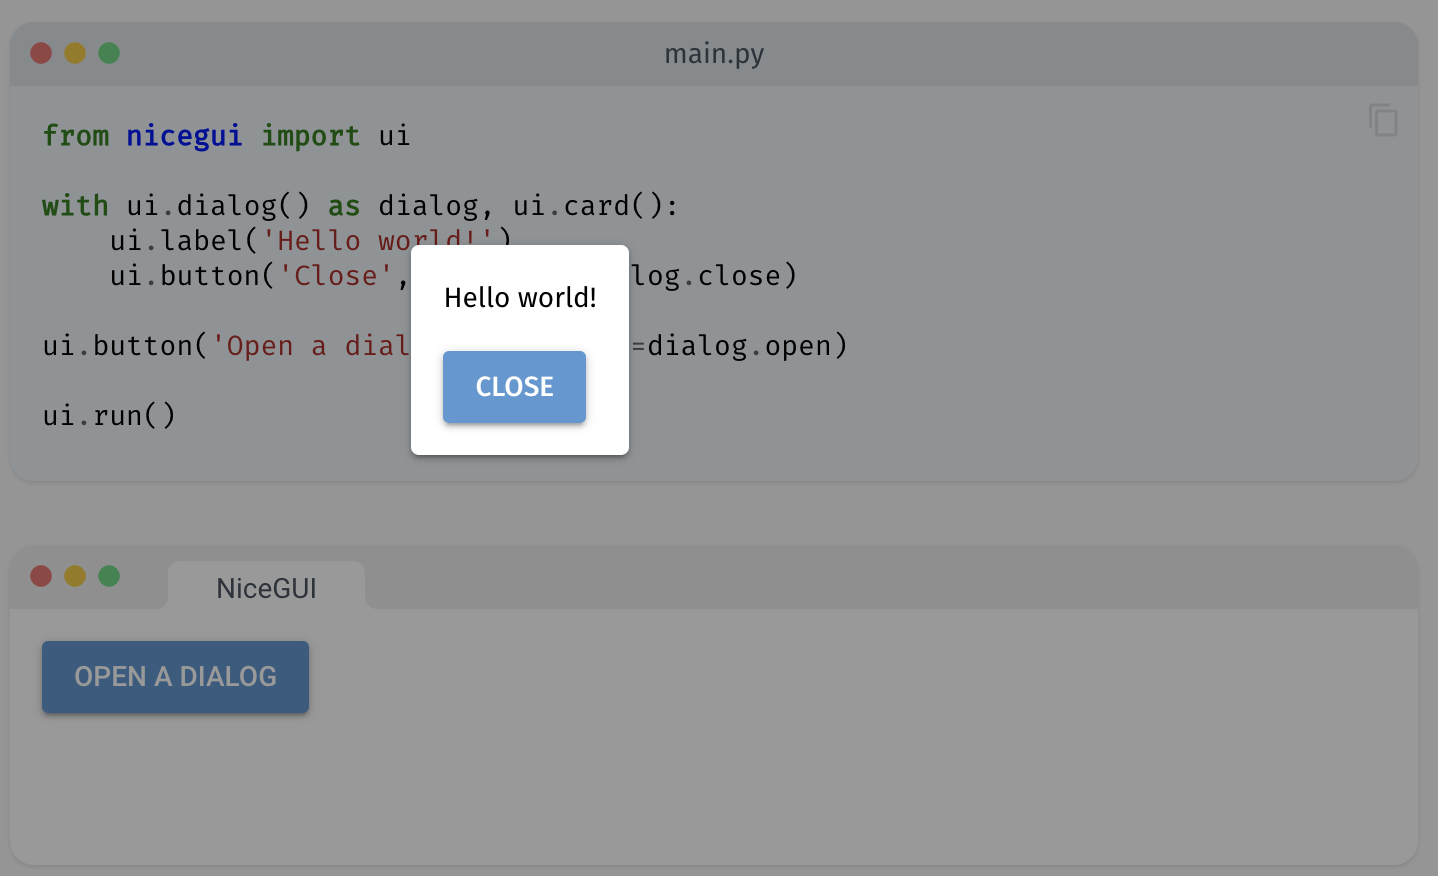
基于 Quasar 的 QDialog 组件 Dialog | Quasar Framework 创建对话框。默认情况下,单击或按 ESC 键即可关闭它。要使其保持可见,可以在对话框元素上设置 .props(‘persistent’)。
from nicegui import ui

with ui.dialog() as dialog, ui.card():
    ui.label('Hello world!')
    ui.button('Close', on_click=dialog.close)

ui.button('Open a dialog', on_click=dialog.open)

ui.run()
六、外观
1、样式
NiceGUI 使用 Quasar Framework 版本1.0,因此具有其完整的设计能力。每个 NiceGUI 元素都提供了一个 props 方法,其中的内容会传递给 Quasar 组件 Introduction - JustPy:请查看 Quasar 文档Button | Quasar Framework 以了解所有样式 props。具有前置冒号 : 的 props 可包含在客户端上评估的 JavaScript 表达式。您还可以使用 classes 方法应用 Tailwind CSS 实用类 Tailwind CSS - Rapidly build modern websites without ever leaving your HTML.。
如果您真的需要应用 CSS 样式,可以使用 styles 方法。这里的分隔符是 ; 而不是空格。
这三个函数还提供了 remove 和 replace 参数,以防特定样式不符合预定义的外观。
from nicegui import ui

ui.radio(['x', 'y', 'z'], value='x').props('inline color=green')
ui.button(icon='touch_app').props('outline round').classes('shadow-lg')
ui.label('Stylish!').style('color: #6E93D6; font-size: 200%; font-weight: 300')

ui.run()

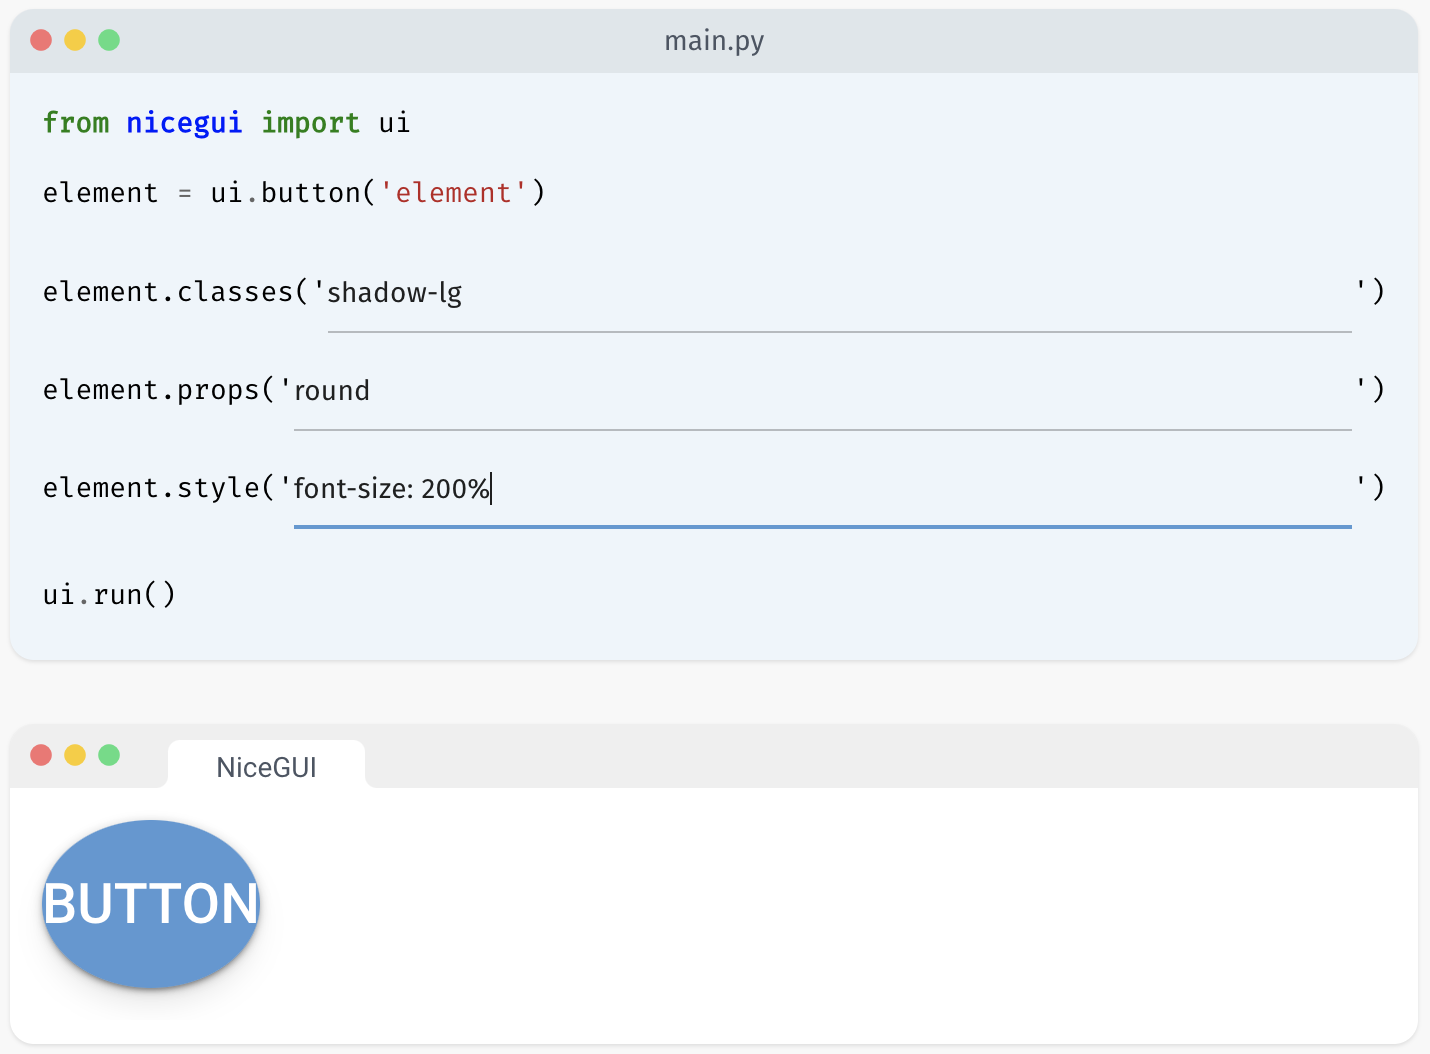
2、尝试样式化 NiceGUI 元素!
尝试使用 Tailwind CSS 类Tailwind CSS - Rapidly build modern websites without ever leaving your HTML.、Quasar 属性Introduction - JustPy和 CSS 样式来影响 NiceGUI 元素。
请选择一个可用的元素,然后开始对其进行样式化!
3、Tailwind CSS
Tailwind CSS - Rapidly build modern websites without ever leaving your HTML. 是一种用于快速构建自定义用户界面的 CSS 框架。NiceGUI 提供了一个流畅的、支持自动完成的界面,用于向 UI 元素添加 Tailwind 类。
您可以通过导航 tailwind 属性的方法来发现可用的类。建造者模式允许您将多个类链接在一起(如 “Label A” 中所示)。您还可以使用一组类来调用 tailwind 属性(如 “Label B” 中所示)。
尽管这与使用 classes 方法非常相似,但对于Tailwind类而言更为方便,因为它支持自动完成。
最后但并非最不重要的是,您还可以预定义一个样式,并将其应用于多个元素(标签 C 和 D)。
from nicegui import Tailwind, ui

ui.label('Label A').tailwind.font_weight('extrabold').text_color('blue-600').background_color('orange-200')
ui.label('Label B').tailwind('drop-shadow', 'font-bold', 'text-green-600')

red_style = Tailwind().text_color('red-600').font_weight('bold')
label_c = ui.label('Label C')
red_style.apply(label_c)
ui.label('Label D').tailwind(red_style)

ui.run()

4、查询选择器
要操作像文档主体这样的元素,您可以使用 ui.query 函数。通过查询结果,您可以像处理其他 UI 元素一样添加类、样式和属性。这可以用来改变页面的背景颜色,例如:ui.query(‘body’).classes(‘bg-green’)。
from nicegui import ui

def set_background(color: str) -> None:
    ui.query('body').style(f'background-color: {color}')

ui.button('Blue', on_click=lambda: set_background('#ddeeff'))
ui.button('Orange', on_click=lambda: set_background('#ffeedd'))

ui.run()

5、颜色主题
设置 Quasar Framework 使用的主要颜色(主色、次要色、强调色等)。
from nicegui import ui

ui.button('Default', on_click=lambda: ui.colors())
ui.button('Gray', on_click=lambda: ui.colors(primary='#555'))

ui.run()

6、暗模式
您可以使用此元素在页面上启用、禁用或切换暗模式。值 None 表示自动模式,使用客户端的系统首选项。
请注意,此元素会覆盖 ui.run 函数和页面装饰器的 dark 参数。
from nicegui import ui

dark = ui.dark_mode()
ui.label('Switch mode:')
ui.button('Dark', on_click=dark.enable)
ui.button('Light', on_click=dark.disable)

ui.run()

七、操作
1、计时器
创建NiceGUI的一个主要动机是需要一个简单的方法来定期更新界面,例如显示收到的测量数据的图表。计时器会以给定的时间间隔重复执行回调函数。
from datetime import datetime
from nicegui import ui

label = ui.label()
ui.timer(1.0, lambda: label.set_text(f'{datetime.now():%X}'))

ui.run()

2、键盘
添加全局键盘事件跟踪。
from nicegui import ui
from nicegui.events import KeyEventArguments

def handle_key(e: KeyEventArguments):
    if e.key == 'f' and not e.action.repeat:
        if e.action.keyup:
            ui.notify('f was just released')
        elif e.action.keydown:
            ui.notify('f was just pressed')
    if e.modifiers.shift and e.action.keydown:
        if e.key.arrow_left:
            ui.notify('going left')
        elif e.key.arrow_right:
            ui.notify('going right')
        elif e.key.arrow_up:
            ui.notify('going up')
        elif e.key.arrow_down:
            ui.notify('going down')

keyboard = ui.keyboard(on_key=handle_key)
ui.label('Key events can be caught globally by using the keyboard element.')
ui.checkbox('Track key events').bind_value_to(keyboard, 'active')

ui.run()

3、绑定
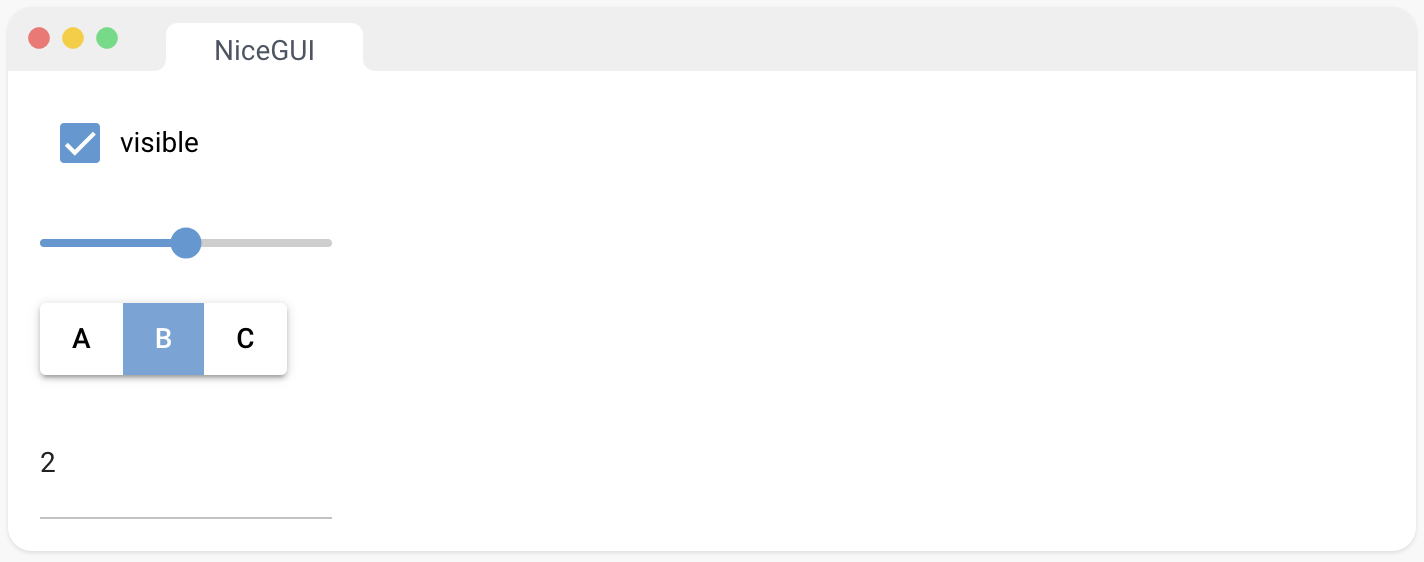
NiceGUI 可以直接将 UI 元素绑定到模型。绑定可以用于 UI 元素属性,如文本、值或可见性,以及(嵌套)类属性的模型属性。每个元素都提供了类似 bind_value 和 bind_visibility 的方法,用于创建与相应属性的双向绑定。要定义单向绑定,使用这些方法的 _from 和 _to 变体。只需将模型的属性作为参数传递给这些方法,即可创建绑定。
from nicegui import ui

class Demo:
    def __init__(self):
        self.number = 1

demo = Demo()
v = ui.checkbox('visible', value=True)
with ui.column().bind_visibility_from(v, 'value'):
    ui.slider(min=1, max=3).bind_value(demo, 'number')
    ui.toggle({1: 'A', 2: 'B', 3: 'C'}).bind_value(demo, 'number')
    ui.number().bind_value(demo, 'number')

ui.run()
4、UI 更新
NiceGUI 会尝试自动将 UI 元素的状态与客户端同步,例如当标签文本、输入值或元素的样式/类/属性发生变化时。在其他情况下,您可以显式地调用 element.update() 或 ui.update(*elements) 来进行更新。演示代码展示了在 ui.chart 上使用这两种方法,因为在 options 字典中难以自动检测到更改。
from nicegui import ui
from random import randint

chart = ui.chart({'title': False, 'series': [{'data': [1, 2]}]}).classes('w-full h-64')

def add():
    chart.options['series'][0]['data'].append(randint(0, 100))
    chart.update()

def clear():
    chart.options['series'][0]['data'].clear()
    ui.update(chart)

with ui.row():
    ui.button('Add', on_click=add)
    ui.button('Clear', on_click=clear)

ui.run()

5、可刷新的 UI 函数
@ui.refreshable 装饰器允许您创建具有 refresh 方法的函数。此方法将自动删除函数创建的所有元素,然后重新创建它们。
import random
from nicegui import ui

numbers = []

@ui.refreshable
def number_ui() -> None:
    ui.label(', '.join(str(n) for n in sorted(numbers)))

def add_number() -> None:
    numbers.append(random.randint(0, 100))
    number_ui.refresh()

number_ui()
ui.button('Add random number', on_click=add_number)

ui.run()

6、异步事件处理程序
大多数元素还支持异步事件处理程序。
注意:您还可以将 functools.partial 传递给 on_click 属性,以包装带有参数的异步函数。
import asyncio
from nicegui import ui

async def async_task():
    ui.notify('Asynchronous task started')
    await asyncio.sleep(5)
    ui.notify('Asynchronous task finished')

ui.button('start async task', on_click=async_task)

ui.run()

7、运行 CPU 密集型任务
NiceGUI 提供了一个 cpu_bound 函数,用于在单独的进程中运行 CPU 密集型任务。这对于长时间运行的计算很有用,否则这些计算会阻塞事件循环,导致 UI 无响应。该函数返回一个可以等待的 future。
import time
from nicegui import run, ui

def compute_sum(a: float, b: float) -> float:
    time.sleep(1)  # simulate a long-running computation
    return a + b

async def handle_click():
    result = await run.cpu_bound(compute_sum, 1, 2)
    ui.notify(f'Sum is {result}')

ui.button('Compute', on_click=handle_click)

ui.run()

8、运行 I/O 密集型任务
NiceGUI 提供了一个 io_bound 函数,用于在单独的线程中运行 I/O 密集型任务。这对于长时间运行的 I/O 操作非常有用,否则这些操作会阻塞事件循环,导致 UI 无响应。该函数返回一个可以等待的 future。
import requests
from nicegui import run, ui

async def handle_click():
    URL = 'https://httpbin.org/delay/1'
    response = await run.io_bound(requests.get, URL, timeout=3)
    ui.notify(f'Downloaded {len(response.content)} bytes')

ui.button('Download', on_click=handle_click)

ui.run()

八、页面
1、页面
此装饰器将一个函数标记为页面构建器。访问给定路由的每个用户都将看到页面的新实例。这意味着它对用户是私有的,不与其他用户共享(与在页面装饰器之外放置元素时的行为不同)。
from nicegui import ui

@ui.page('/other_page')
def other_page():
    ui.label('Welcome to the other side')
    ui.link('Back to main page', '/documentation#page')

@ui.page('/dark_page', dark=True)
def dark_page():
    ui.label('Welcome to the dark side')
    ui.link('Back to main page', '/documentation#page')

ui.link('Visit other page', other_page)
ui.link('Visit dark page', dark_page)

ui.run()

2、自动索引页面
使用 @ui.page 装饰器创建的页面是“私有”的。它们的内容会为每个客户端重新创建。因此,在右侧的演示中,当浏览器重新加载页面时,私有页面上显示的 ID 会发生变化。
未包含在装饰的页面函数中的 UI 元素将放置在位于路由 “/” 下的自动生成的自动索引页面上。这个自动索引页面在启动时创建一次,并在可能连接的所有客户端之间共享。因此,每个连接的客户端都将看到相同的元素。在右侧的演示中,当浏览器重新加载页面时,自动索引页面上显示的 ID 保持不变。
from nicegui import ui
from uuid import uuid4

@ui.page('/private_page')
async def private_page():
    ui.label(f'private page with ID {uuid4()}')

ui.label(f'shared auto-index page with ID {uuid4()}')
ui.link('private page', private_page)

ui.run()

3、页面布局
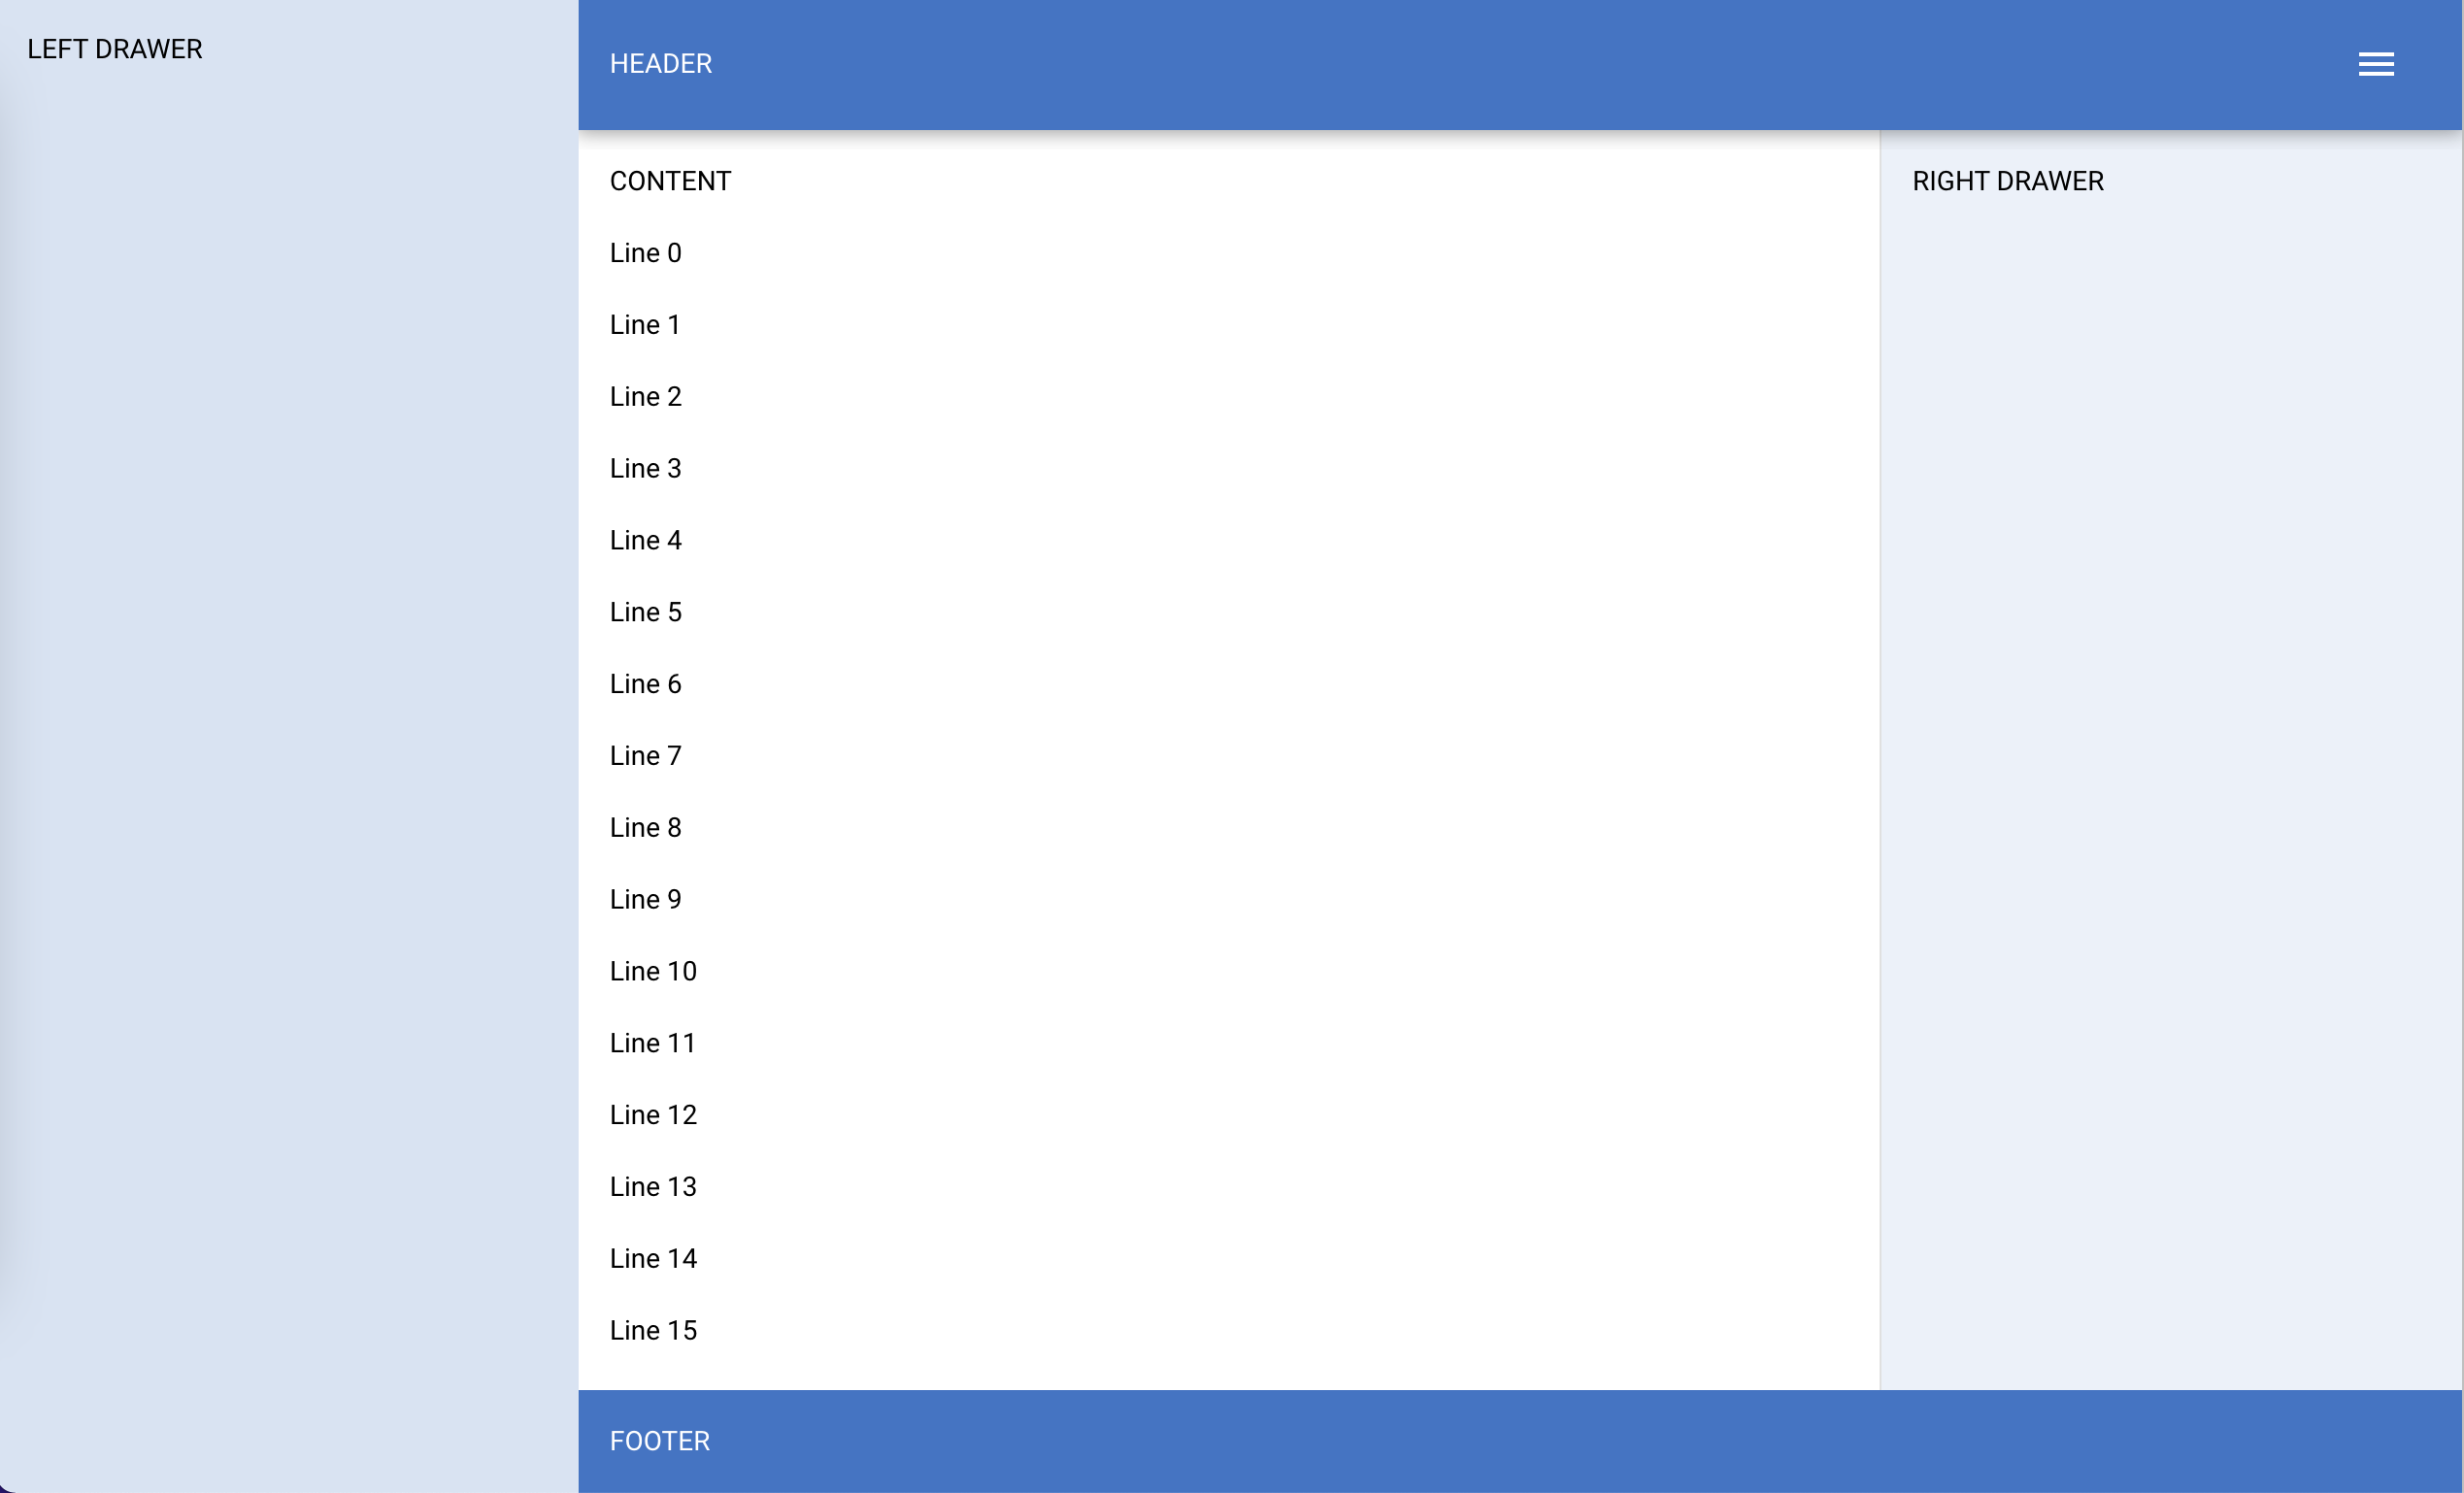
使用 ui.header、ui.footer、ui.left_drawer 和 ui.right_drawer,您可以向页面添加额外的布局元素。fixed 参数控制元素是否应滚动或固定在屏幕上。top_corner 和 bottom_corner 参数指示抽屉是否应展开到页面的顶部或底部。有关可能的 props 的更多信息,请参阅 https://quasar.dev/layout/header-and-footer 和 https://quasar.dev/layout/drawer。使用 ui.page_sticky,您可以将元素“粘”在屏幕上。有关更多信息,请参阅 https://quasar.dev/layout/page-sticky。
from nicegui import ui

@ui.page('/page_layout')
def page_layout():
    ui.label('CONTENT')
    [ui.label(f'Line {i}') for i in range(100)]
    with ui.header(elevated=True).style('background-color: #3874c8').classes('items-center justify-between'):
        ui.label('HEADER')
        ui.button(on_click=lambda: right_drawer.toggle(), icon='menu').props('flat color=white')
    with ui.left_drawer(top_corner=True, bottom_corner=True).style('background-color: #d7e3f4'):
        ui.label('LEFT DRAWER')
    with ui.right_drawer(fixed=False).style('background-color: #ebf1fa').props('bordered') as right_drawer:
        ui.label('RIGHT DRAWER')
    with ui.footer().style('background-color: #3874c8'):
        ui.label('FOOTER')

ui.link('show page with fancy layout', page_layout)

ui.run()

4、打开
可以用于以编程方式触发特定客户端的重定向。
当使用 new_tab 参数时,浏览器可能会阻止新标签页。这是浏览器的设置,不能由应用程序更改。您可能希望改为使用 ui.link 及其 new_tab 参数。
注意:当使用自动生成的自动索引页面(例如没有 @page 装饰器)时,连接到页面的所有客户端(即浏览器)都将打开目标 URL,除非指定了 socket。用户事件(例如按钮点击)提供了这样的 socket。
from nicegui import ui

@ui.page('/yet_another_page')
def yet_another_page():
    ui.label('Welcome to yet another page')
    ui.button('RETURN', on_click=lambda: ui.open('documentation#open'))

ui.button('REDIRECT', on_click=lambda: ui.open(yet_another_page))

ui.run()

5、下载
用于触发文件下载的函数。
from nicegui import ui

ui.button('NiceGUI Logo', on_click=lambda: ui.download('https://nicegui.io/logo.png'))

ui.run()

6、存储
NiceGUI 提供了一个简单的方法来在应用程序内进行数据持久化。它具有三种内置的存储类型:
- app.storage.user:
存储在服务器端,每个字典都与保存在浏览器会话 cookie 中的唯一标识符关联。对于每个用户都是唯一的,可以在其所有浏览器选项卡中访问此存储。app.storage.browser[‘id’] 用于识别用户。
- app.storage.general:
也存储在服务器端,此字典提供了一个供所有用户访问的共享存储空间。
- app.storage.browser:
与前两种不同,此字典直接存储在浏览器会话 cookie 中,供同一用户的所有浏览器选项卡共享。但是,通常更倾向于使用 app.storage.user,因为它具有减少数据负载、增强安全性和提供更大存储容量的优势。默认情况下,NiceGUI 在 app.storage.browser[‘id’] 中保存了浏览器会话的唯一标识符。
用户存储和浏览器存储只能在页面构建函数 page • NiceGUI 内使用,因为它们访问 FastAPI 的底层 Request 对象。此外,这两种类型需要ui.run()中的 storage_secret 参数来加密浏览器会话 cookie。
from nicegui import app, ui

@ui.page('/')
def index():
    app.storage.user['count'] = app.storage.user.get('count', 0) + 1
    with ui.row():
       ui.label('your own page visits:')
       ui.label().bind_text_from(app.storage.user, 'count')

ui.run(storage_secret='private key to secure the browser session cookie')

7、参数注入
由于 FastAPI 的支持,页面函数接受可选参数,以提供路径参数、查询参数或整个传入请求,以便访问请求体负载、标头、cookie 等等。
from nicegui import ui

@ui.page('/icon/{icon}')
def icons(icon: str, amount: int = 1):
    ui.label(icon).classes('text-h3')
    with ui.row():
        [ui.icon(icon).classes('text-h3') for _ in range(amount)]
ui.link('Star', '/icon/star?amount=5')
ui.link('Home', '/icon/home')
ui.link('Water', '/icon/water_drop?amount=3')

ui.run()

8、运行 JavaScript
此函数在浏览器中执行任意 JavaScript 代码的页面上运行。异步函数将在命令执行后返回。在调用此函数之前,客户端必须连接。要通过 ID 访问客户端对象,请使用 JavaScript 函数 getElement()。
from nicegui import ui

async def alert():
    await ui.run_javascript('alert("Hello!")', respond=False)

async def get_date():
    time = await ui.run_javascript('Date()')
    ui.notify(f'Browser time: {time}')

async def access_elements():
    await ui.run_javascript(f'getElement({label.id}).innerText += " Hello!"')

ui.button('fire and forget', on_click=alert)
ui.button('receive result', on_click=get_date)
ui.button('access elements', on_click=access_elements)
label = ui.label()

ui.run()

九、路由
1、静态文件
add_static_files() 使本地目录在指定的端点(例如 ‘/static’)上可用。这对于向前端提供本地数据,如图像,非常有用。否则,浏览器将无法访问这些文件。只将非关键安全文件放在其中,因为它们对每个人都是可访问的。
要使单个文件可访问,可以使用 add_static_file()。对于应该以流的形式传输的媒体文件,可以使用 add_media_files() 或 add_media_file()。"
url_path: 以斜杠“/”开头的字符串,用于标识应该提供文件的路径
local_directory: 包含要用作静态内容提供的文件的本地文件夹
from nicegui import app, ui

app.add_static_files('/examples', 'examples')
ui.label('Some NiceGUI Examples').classes('text-h5')
ui.link('AI interface', '/examples/ai_interface/main.py')
ui.link('Custom FastAPI app', '/examples/fastapi/main.py')
ui.link('Authentication', '/examples/authentication/main.py')

ui.run()

2、媒体文件
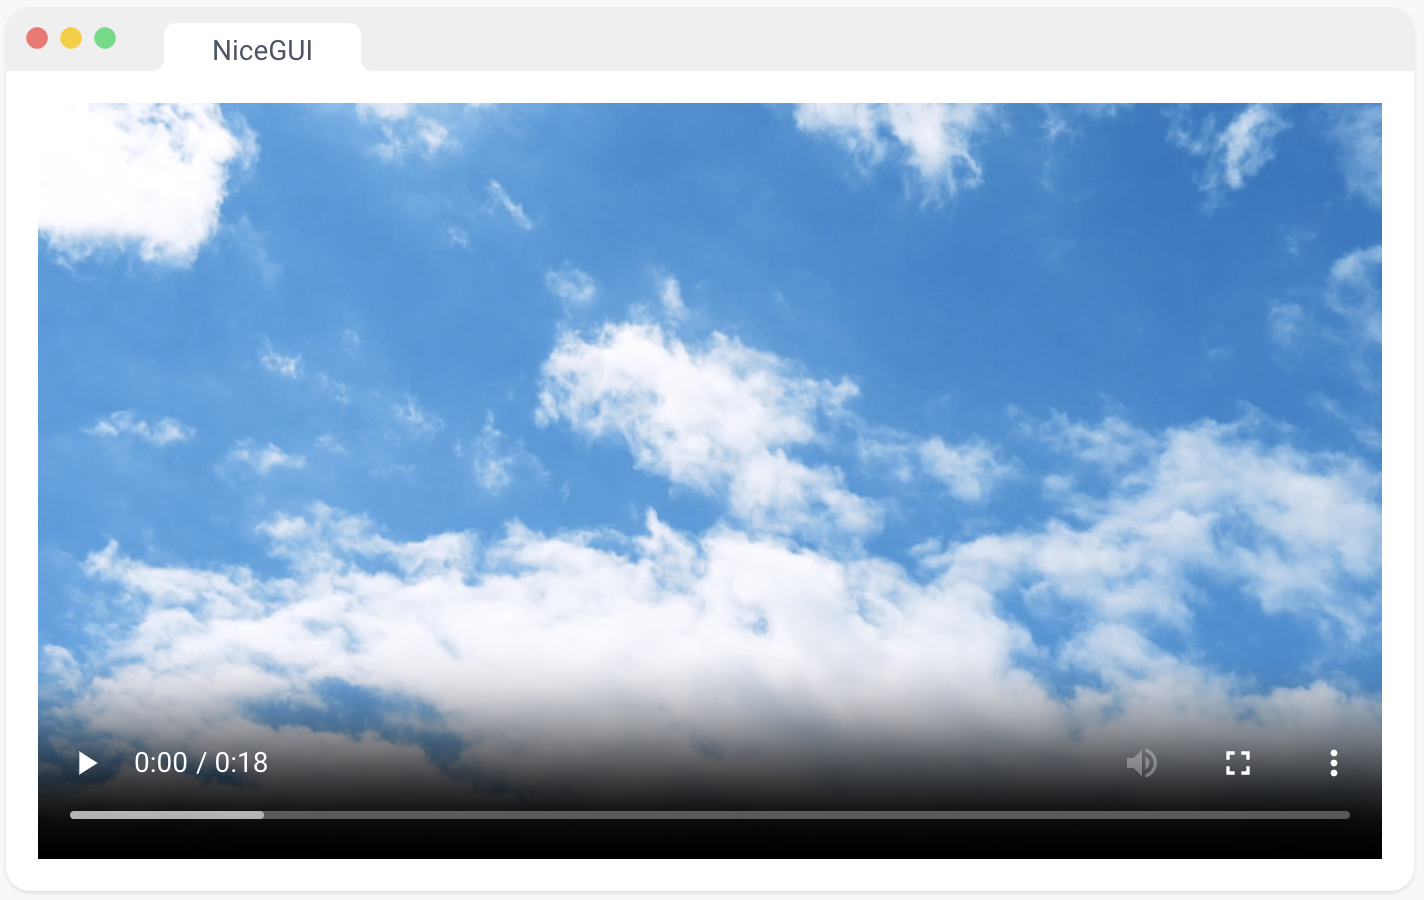
add_media_files() 允许从指定的端点(例如 ‘/media’)流式传输本地文件。这应该用于支持正确流式传输的媒体文件。否则,浏览器将无法逐渐访问和加载文件,也无法跳转到流中的不同位置。只将非关键安全文件放在其中,因为它们对每个人都是可访问的。
要使单个文件通过流式传输可访问,可以使用 add_media_file()。对于小的静态文件,可以使用 add_static_files() 或 add_static_file()。"
url_path: 以斜杠“/”开头的字符串,用于标识应该提供文件的路径
local_directory: 包含要用作媒体内容提供的文件的本地文件夹
import requests
from nicegui import app, ui
from pathlib import Path

media = Path('media')
media.mkdir(exist_ok=True)
r = requests.get('https://cdn.coverr.co/videos/coverr-cloudy-sky-2765/1080p.mp4')
(media  / 'clouds.mp4').write_bytes(r.content)
app.add_media_files('/my_videos', media)
ui.video('/my_videos/clouds.mp4')

ui.run()
3、API 响应
NiceGUI 基于 FastAPI。这意味着您可以使用 FastAPI 的所有功能。例如,您可以在图形用户界面之外实现 RESTful API。只需从 nicegui 导入 app 对象。或者,您可以在自己的 FastAPI 应用程序之上运行 NiceGUI,而不是使用 ui.run() 自动启动服务器,使用 ui.run_with(app)。
您还可以在页面函数内返回任何其他 FastAPI 响应对象。例如,如果满足某些条件,您可以返回 RedirectResponse 来将用户重定向到另一个页面。这在我们的身份验证演示中有使用。
import random
from nicegui import app, ui

@app.get('/random/{max}')
def generate_random_number(max: int):
    return {'min': 0, 'max': max, 'value': random.randint(0, max)}

max = ui.number('max', value=100)
ui.button('generate random number', on_click=lambda: ui.open(f'/random/{max.value:.0f}'))

ui.run()

十、生命周期
1、事件
您可以注册协程或函数来处理以下事件:
- app.on_startup:在 NiceGUI 启动或重新启动时调用
- app.on_shutdown:在 NiceGUI 关闭或重新启动时调用
- app.on_connect:在每个连接的客户端上调用(可选参数:nicegui.Client)
- app.on_disconnect:在每个断开连接的客户端上调用(可选参数:nicegui.Client)
- app.on_exception:在发生异常时调用(可选参数:异常)
当 NiceGUI 关闭或重新启动时,仍在执行中的所有任务将自动取消。
from datetime import datetime
from nicegui import app, ui

dt = datetime.now()

def handle_connection():
    global dt
    dt = datetime.now()
app.on_connect(handle_connection)

label = ui.label()
ui.timer(1, lambda: label.set_text(f'Last new connection: {dt:%H:%M:%S}'))

ui.run()

2、关闭
这将以编程方式停止服务器。仅在自动重载被禁用时才可能。
from nicegui import app, ui

ui.button('shutdown', on_click=app.shutdown)

ui.run(reload=False)

3、URL
您可以通过 app.urls 访问 NiceGUI 应用程序可用的所有 URL 列表。URL 在 app.on_startup 中不可用,因为服务器尚未运行。相反,您可以在页面函数中访问它们,或者使用 app.urls.on_change 注册回调函数。
from nicegui import app, ui

@ui.page('/')
def index():
    for url in app.urls:
        ui.link(url, target=url)

ui.run()

十一、NiceGUI 基本概念
1、自动上下文
为了允许编写直观的 UI 描述,NiceGUI 自动跟踪元素创建的上下文。这意味着不需要显式的 parent 参数。而是使用 with 语句定义父上下文。它还传递给事件处理程序和计时器。
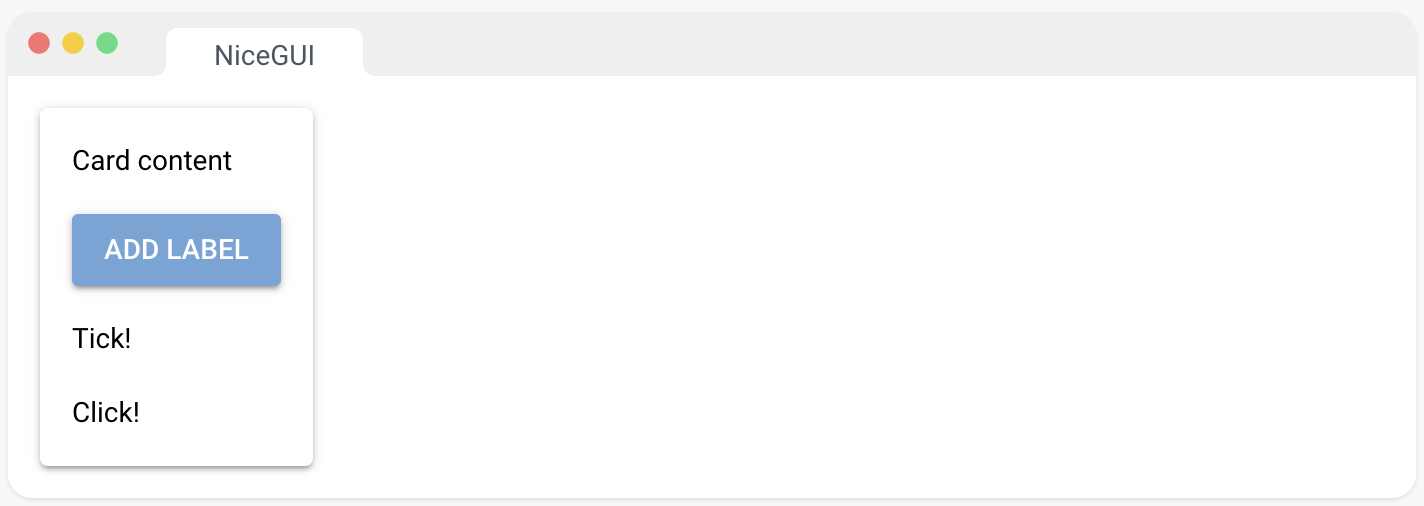
在演示中,将标签“Card content”添加到卡片中。由于 ui.button 也添加到卡片中,标签“Click!” 也将在此上下文中创建。标签“Tick!”,在一秒后添加一次,也会添加到卡片中。
这个设计决策使得可以轻松创建模块化组件,即使在 UI 中移动它们,它们仍然可以正常工作。例如,可以将标签和按钮移到其他地方,可能将它们包装在另一个容器中,代码仍然可以正常工作。
from nicegui import ui

with ui.card():
    ui.label('Card content')
    ui.button('Add label', on_click=lambda: ui.label('Click!'))
    ui.timer(1.0, lambda: ui.label('Tick!'), once=True)

ui.run()
2、通用事件
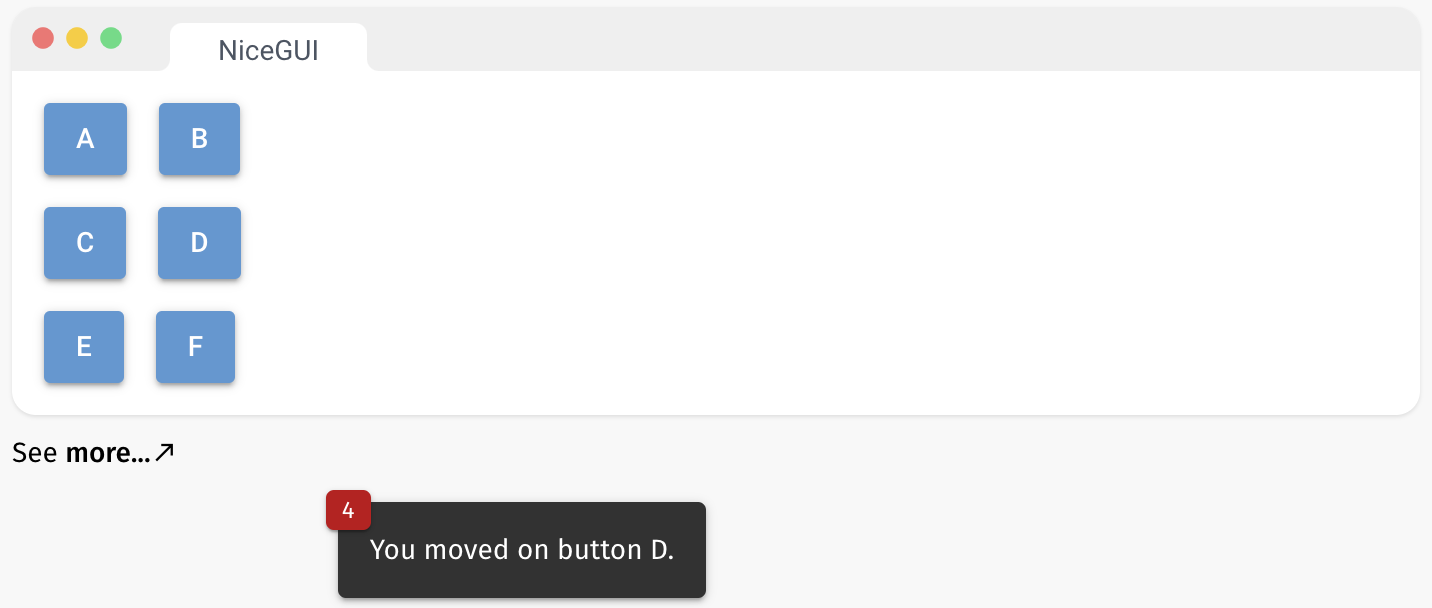
大多数 UI 元素都带有预定义的事件。例如,像演示中的 ui.button “A” 有一个 on_click 参数,它期望一个协程或函数。但是您也可以使用 on 方法来注册一个通用事件处理程序,就像 “B” 那样。这允许您注册任何 JavaScript 和 Quasar 支持的事件处理程序。
例如,您可以为像 “C” 那样的 mousemove 事件注册一个处理程序,即使 ui.button 没有 on_mousemove 参数。有些事件,如 mousemove,会非常频繁地触发。为了避免性能问题,您可以使用 throttle 参数,只有在每 throttle 秒时才调用处理程序(“D”)。
通用事件处理程序可以是同步的或异步的,可选地接受 GenericEventArguments 作为参数(“E”)。您还可以指定应将 JavaScript 或 Quasar 事件的哪些属性传递给处理程序(“F”)。这可以减少需要在服务器和客户端之间传输的数据量。
在这里,您可以找到更多关于支持的事件的信息:
HTMLElement - Web APIs | MDN (mozilla.org) 用于 HTML 元素
Quasar Components | Quasar Framework 用于 Quasar 元素(请参见每个组件页面上的"事件"选项卡)
from nicegui import ui

with ui.row():
    ui.button('A', on_click=lambda: ui.notify('You clicked the button A.'))
    ui.button('B').on('click', lambda: ui.notify('You clicked the button B.'))
with ui.row():
    ui.button('C').on('mousemove', lambda: ui.notify('You moved on button C.'))
    ui.button('D').on('mousemove', lambda: ui.notify('You moved on button D.'), throttle=0.5)
with ui.row():
    ui.button('E').on('mousedown', lambda e: ui.notify(e))
    ui.button('F').on('mousedown', lambda e: ui.notify(e), ['ctrlKey', 'shiftKey'])

ui.run()
十二、配置
1、ui.run
您可以调用 ui.run() 并提供可选参数:
from nicegui import ui

ui.label('page with custom title')

ui.run(title='My App')

2、本机模式
您可以通过在 ui.run 函数中指定 native=True 来启用 NiceGUI 的本机模式。要自定义初始窗口大小和显示模式,请分别使用 window_size 和 fullscreen 参数。此外,您可以通过 app.native.window_args 和 app.native.start_args 提供额外的关键字参数。选择由内部使用的 pywebview 模块 API | pywebview (flowrl.com) 为 webview.create_window 和 webview.start 函数定义的任何参数。请注意,这些关键字参数将优先于 ui.run 中定义的参数。
在本机模式中,app.native.main_window 对象允许您访问底层窗口。它是 pywebview 中 Window 的异步版本 API | pywebview (flowrl.com) 。
from nicegui import app, ui

app.native.window_args['resizable'] = False
app.native.start_args['debug'] = True

ui.label('app running in native mode')
ui.button('enlarge', on_click=lambda: app.native.main_window.resize(1000, 700))

ui.run(native=True, window_size=(400, 300), fullscreen=False)

如果 webview 难以找到所需的库,您可能会遇到与 “WebView2Loader.dll” 相关的错误。要解决此问题,请尝试将 DLL 文件移动到上一级目录,例如:
- 从 .venv/Lib/site-packages/webview/lib/x64/WebView2Loader.dll
- 到 .venv/Lib/site-packages/webview/lib/WebView2Loader.dll
3、环境变量
您可以设置以下环境变量来配置 NiceGUI:
- MATPLOTLIB(默认值:true)可以设置为 false 以避免导入 Matplotlib,从而使 ui.pyplot 和 ui.line_plot 不可用。
- NICEGUI_STORAGE_PATH(默认值:本地 “.nicegui”)可以设置以更改存储文件的位置。
- MARKDOWN_CONTENT_CACHE_SIZE(默认值:1000):内存中缓存的最大 Markdown 内容片段数。
- NO_NETIFACES(默认值:false):可以设置为 true 以隐藏 netifaces 的启动警告(例如在 Docker 容器中)。
from nicegui import ui
from nicegui.elements import markdown

ui.label(f'Markdown content cache size is {markdown.prepare_content.cache_info().maxsize}')

ui.run()

十三、部署
1、服务器托管
要在服务器上部署您的 NiceGUI 应用程序,您需要在云基础设施上执行您的 main.py(或包含您的 ui.run(…) 的任何包含该命令的文件)。例如,您可以通过 pip 安装 NiceGUI Python 包 nicegui · PyPI,然后使用 systemd 或类似的服务来启动主脚本。在大多数情况下,您可以使用 ui.run 命令将端口设置为 80(或者如果您想使用 HTTPS,则为 443),以便从外部轻松访问。
一个方便的替代方法是使用我们预构建的多架构 Docker 镜像 zauberzeug/nicegui - Docker Image | Docker Hub,该镜像包含所有必要的依赖项。使用以下命令,您可以在公共端口 80 上启动当前目录中的 main.py 脚本:
docker run -it --restart always \
  -p 80:8080 \
  -e PUID=$(id -u) \
  -e PGID=$(id -g) \
  -v $(pwd)/:/app/ \
  zauberzeug/nicegui:latest
该演示假定 main.py 在 ui.run 命令中使用默认的端口 8080。-d 告诉 Docker 在后台运行,–restart always 会确保容器在应用程序崩溃或服务器重新启动时重新启动。当然,您也可以将此配置写入 Docker Compose 文件中:
app:
    image: zauberzeug/nicegui:latest
    restart: always
    ports:
        - 80:8080
    environment:
        - PUID=1000 # change this to your user id
        - PGID=1000 # change this to your group id
    volumes:
        - ./:/app/
Docker 镜像还具有其他实用功能,如非 root 用户执行和信号传递。有关更多详细信息,建议查看我们的 Docker 示例。nicegui/examples/docker_image at main · zauberzeug/nicegui (github.com)
您可以直接使用 FastAPI About HTTPS - FastAPI (tiangolo.com) 提供 SSL 证书。在生产环境中,我们还喜欢使用反向代理,如 Traefik Traefik Proxy Documentation - Traefik 或 NGINX Advanced Load Balancer, Web Server, & Reverse Proxy - NGINX,来处理这些详细信息。可以查看我们的开发 docker-compose.yml 作为示例nicegui/docker-compose.yml at main · zauberzeug/nicegui (github.com)。
您还可以查看我们的示例 nicegui/examples/fastapi at main · zauberzeug/nicegui (github.com),了解如何使用自定义 FastAPI 应用程序。这将使您能够执行 FastAPI 文档 Deployment - FastAPI (tiangolo.com) 中描述的非常灵活的部署。请注意,要允许多个工作进程,需要执行其他步骤。
2、安装包
NiceGUI 应用程序还可以使用 PyInstaller PyInstaller Manual — PyInstaller 6.1.0 documentation 打包成可执行文件。这样,您可以将您的应用程序分发为一个可以在任何计算机上执行的单个文件。
只需确保您的 ui.run 命令没有使用 reload 参数。运行下面的 build.py 将在 dist 文件夹中创建一个名为 myapp 的可执行文件:
from nicegui import native_mode, ui

ui.label('Hello from PyInstaller')

ui.run(reload=False, port=native_mode.find_open_port())
import os
import subprocess
from pathlib import Path
import nicegui

cmd = [
    'python',
    '-m', 'PyInstaller',
    'main.py', # your main file with ui.run()
    '--name', 'myapp', # name of your app
    '--onefile',
    #'--windowed', # prevent console appearing, only use with ui.run(native=True, ...)
    '--add-data', f'{Path(nicegui.__file__).parent}{os.pathsep}nicegui'
]
subprocess.call(cmd)
打包提示
- 构建 PyInstaller 应用程序时,主要脚本可以使用本地窗口(而不是浏览器窗口),方法是使用 ui.run(reload=False, native=True)。native 参数可以是 True 或 False,具体取决于您是否想要本地窗口或在用户的浏览器中启动页面 - 两者在 PyInstaller 生成的应用程序中都可以工作。
- 指定 --windowed 给 PyInstaller 将阻止终端控制台出现。然而,只有在您的 ui.run 命令中还指定了 native=True 选项时,才应使用此选项。如果没有终端控制台,用户将无法通过按 Ctrl-C 来退出应用程序。使用 native=True 选项时,应用程序将在窗口关闭时自动关闭,这是预期的行为。
- 指定 --windowed 给 PyInstaller 将在 Mac 上创建一个 .app 文件,可能更方便分发。当您双击该应用程序以运行它时,它将不显示任何控制台输出。您也可以从命令行中运行应用程序 ./myapp.app/Contents/MacOS/myapp 以查看控制台输出。
- 指定 --onefile 给 PyInstaller 将创建一个单独的可执行文件。虽然方便分发,但启动速度会较慢。这不是 NiceGUI 的问题,而只是 PyInstaller 将文件压缩到单个文件中,然后在运行之前将所有文件解压到临时目录的方式。您可以通过从 PyInstaller 命令中删除 --onefile 并自己压缩生成的 dist 目录来缓解这个问题,并将其分发给您的最终用户。最终用户可以解压一次,然后立即开始,而不需要由于 --onefile 标志的不断文件扩展。
- 不同选项的用户体验总结:
| PyInstaller | ui.run(…) | 解释 |
|---|---|---|
| onefile | native=False | 生成一个单一的可执行文件,位于 dist/ 目录中,以浏览器方式运行 |
| onefile | native=True | 生成一个单一的可执行文件,位于 dist/ 目录中,以弹出窗口方式运行 |
onefileandwindowed |
native=True | 生成一个单一的可执行文件,位于 dist/(在Mac上,会生成一个带图标的dist/myapp.app文件),运行在弹出式窗口中,不会显示控制台 |
onefileandwindowed |
native=False | 避免(无法退出应用程序的方式) |
| 不指定 | 创建 dist/myapp 目录,可以手动压缩并分发;使用 dist/myapp/myapp 运行 |
- 如果你正在使用 Python 虚拟环境,请确保在虚拟环境中使用
pip install pyinstaller,以确保使用正确的 PyInstaller 版本,否则可能会出现应用程序无法正常工作的问题,因为选择了错误版本的 PyInstaller。这就是为什么构建脚本使用python -m PyInstaller来调用 PyInstaller,而不是仅仅使用pyinstaller。
python -m venv venv
source venv/bin/activate
pip install nicegui
pip install pyinstaller
注意:如果你遇到 “TypeError: a bytes-like object is required, not ‘str’” 错误,请尝试在你的 main.py 文件的顶部添加以下几行代码:
import sys
sys.stdout = open('logs.txt', 'w')
See https://github.com/zauberzeug/nicegui/issues/681 for more information.
3、NiceGUI On Air
使用 ui.run(on_air=True) 可以在互联网上与其他人共享你的本地应用程序 🧞。
访问 on-air URL 时,所有库(如 Vue、Quasar 等)都从我们的 CDN 加载。因此,只需传输你的本地应用程序的原始内容和事件。这使得即使你的应用程序只有较差的互联网连接(例如,现场的移动机器人),它仍然可以运行得非常快速。
通过设置 on_air=True,你将获得一个有效期为1小时的随机URL。如果你在 https://on-air.nicegui.io 注册,你将获得一个标识你的设备的令牌,可以用来设置 ui.run(on_air='<你的令牌>'),这将为你提供一个固定的URL,并允许你使用密码保护远程访问。
当前 On Air 作为技术预览版本免费使用(暂时)。我们将逐渐提高稳定性,引入付款选项,并扩展服务以支持多设备管理、远程终端访问等。请在 GitHub zauberzeug/nicegui · Discussions · GitHub、Reddit NiceGUI (reddit.com) 或 Discord Discord 上告诉我们您的反馈。
数据隐私:我们非常重视您的隐私。NiceGUI On Air 不会记录或存储中继数据的任何内容。
